
Google Tag Manager(GTM) is a powerful tag management tool you can use to manage your analytics and marketing tags. To be able to benefit from this tool, it is necessary that you know the right way to install it on your website.
When it comes to WordPress, most site owners become very concerned about where and how to add the GTM tracking code. If you are one of those confused WordPress users, you are about to be taught the right way to install Google Tag Manager on your WordPress site.
By the end of this article, you will be able to set up GTM on your site correctly and have it ready to be put to use.
1. Create a GTM Account
If you are new to GTM, you will have to create a new account. Follow the steps detailed below to create a new GTM account. If you already have one, you may skip this..
- Open tagmanager.google.com in a new tab
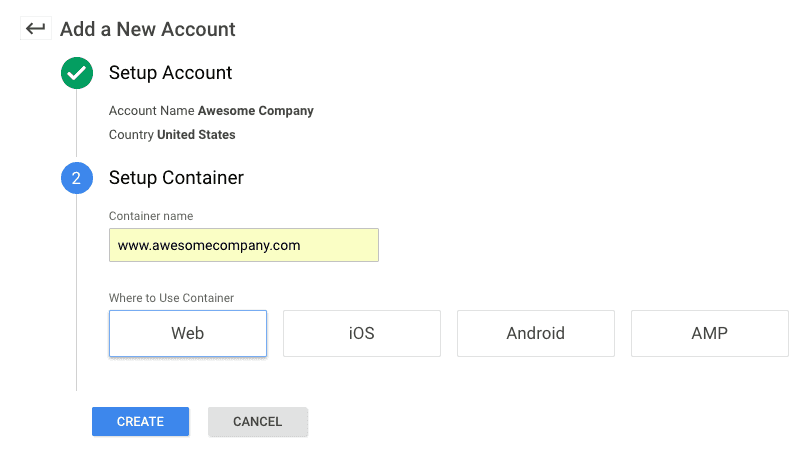
- Add the required details to create your account
- Enter your website name in the account name field
- Select your country from the drop-down list
- Click continue button
- Enter your website URL in the container name field
- Click web under where to use container options
- Click create to create your account
A pop-up window will appear with GTM terms & services. Click agree to continue
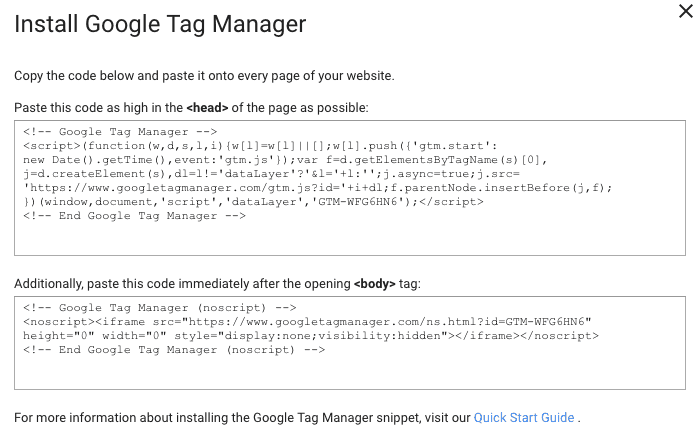
After this, a second pop up will appear displaying the GTM container codes.
Keep this window as it is and open your WordPress dashboard in a new tab.
2. Adding Google Tag Manager on WordPress
There are two ways to add the GTM tracking code on your WordPress site. You can either add the GTM container code directly to the website or install a GTM plugin.
The recommended practice is adding the GTM code directly to the WordPress code. However, in some cases, this doesn’t work.
There are few WordPress themes that do not allow the addition of external code and if you have a WooCommerce site, you will have to add the GTM plugin for setting up enhanced ecommerce tracking.
Both methods are explained in the following.
a) Adding GTM without a Plugin
Your first choice should be to add the GTM code without using a plugin. To do this,
Open your WordPress dashboard
Navigate to appearance >> editor from the left menu
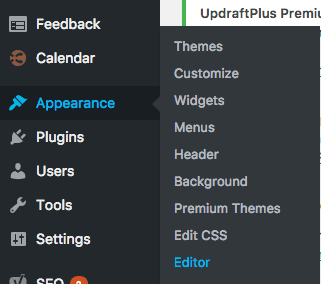
Look for header.php file from the list of files on the right
If you cannot find the header.php file, look for index.php where you can see the head and body part of your website.
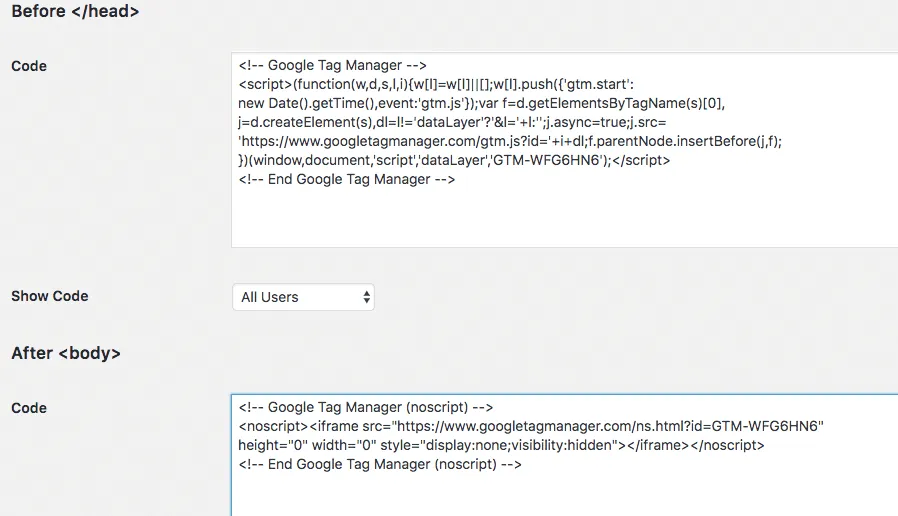
Now, navigate to your GTM account and copy the first code and paste it right after the opening the head tag in the header.php file.
Copy the second code and paste it right after the opening body tag.
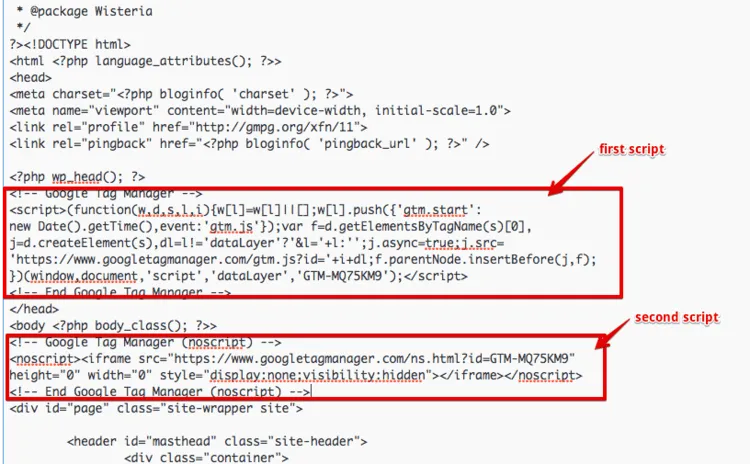
Click on the update button to save changes.
b) Adding GTM using a Plugin
There are a lot of plugins available to set up GTM code. But I recommend you to add any of the below two plugins because they work perfectly with almost all WordPress themes.
1. DuracellTomi’s Google Tag Manager plugin
Add this plugin, if you have a WooCommerce store and want to set up Google Analytics enhanced ecommerce tracking with GTM.
If your website falls into this category, we have already covered in detail setting up enhanced ecommerce with GTM.
2. DCO Insert Analytics Code plugin
Install & activate this plugin.
Navigate to Settings >> DCO Insert Analytics Code from the left menu
Add the first GTM code in the head section field and the second code in the body section field just after the opening body tag.
Save the changes.
Use the second plugin on any WordPress site you have. The good thing about this plugin is that it adds the GTM code on the right place without causing issues.
3. Verifying GTM Installation
There are multiple ways to verify GTM installation on your website. The recommended method is to verify with Google Tag Assistant. This is a browser extension used for testing and debugging Google tracking codes.
After installing this extension, open your website in a new tab. Click the tag assistant icon and enable it. Now, reload your page.
Tag Assistant will display all the tracking codes added on your site. If it shows your GTM tracking id, it means the installation is done properly.
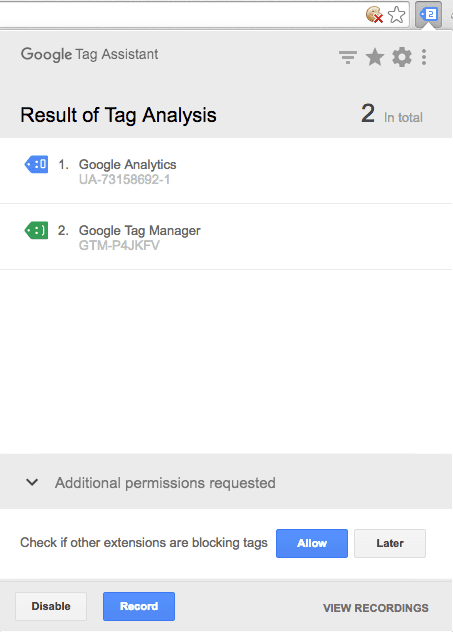
You will see the GTM tag displayed in yellow color and showing up an error. This isn’t actually an error, after adding anything in your GTM container, this will disappear automatically.
4. Connecting GA with GTM
Now, if you have added the Google Tag Manager code on your website, there is no need to add the Google Analytics tracking code. You will now use, Google Tag Manager to set up analytics.
If you are already using Google Analytics on your website and moving to GTM, make sure to follow through the GTM migration steps to protect your data.
If you are adding a new Google Analytics account to your website, follow the steps below:
Follow the steps here to create a new Google Analytics account, in case you don’t know how to do it.
After creating your account, navigate to admin, & click property settings
Copy the tracking ID displayed under the property settings
![]()
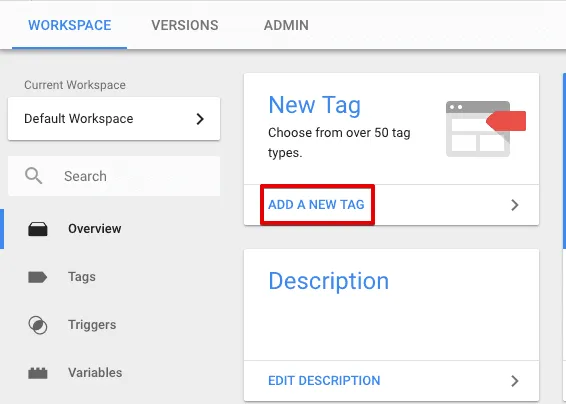
Now, jump to your tag manager account
Create a new tag
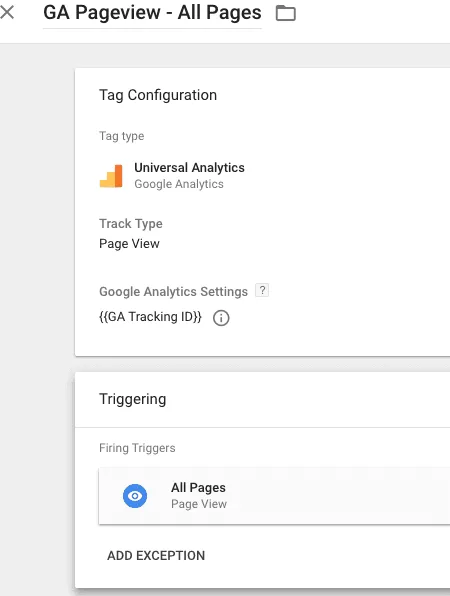
Enter the tag name as ‘GA Pageview – All Pages’
Click on the tag configuration, and select universal analytics as the tag type
Click on the Google Analytics Settings drop-down, and click ‘new variable’ option.
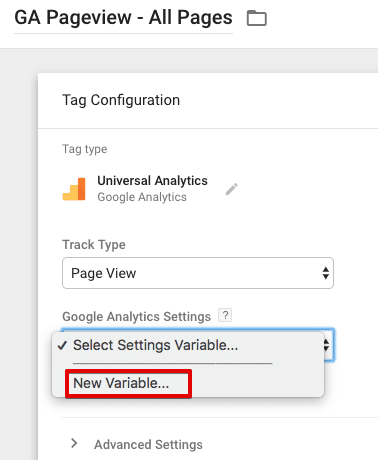
On the pop-up window, enter the variable name as ‘GA Tracking ID’, and paste the tracking ID you copied earlier in the Tracking ID field.

Save this variable.
Note: Once you have created a variable for GA tracking ID, you can use this for all GA tags you create in the future. There is no need to copy and paste the GA ID again next time.
Click on the ‘triggering’ option under the tag configuration and select the ‘All Pages’ default variable.
Your final, Google Analytics tag should look similar to the one below
Save this tag.
5. Excluding WordPress Admins
The purpose of Google Analytics is to track the number of people who visit your website, so, it is necessary to exclude your own website visits, or internal traffic, in other words, in order for the data to remain accurate. We have already talked about excluding internal wordpress traffic in detail in a previous article, however, if you missed it, you can check it out here.
6. Over to You!
Now you have successfully added Google Tag Manager & Google Analytics to your website. It’s time to make use of GTM to track visitor actions and drill down analytics data to understand user behavior on your site and drive them towards your business goals.
If you are a GTM beginner, we have a brilliant beginners guide to get started with GTM for you, and our blog is filled with insanely helpful GTM and GA recipes.
Bonus guide for every Google Analytics user
If you have made to this point and had success with the above guide, I would recommend you to follow one more essential step. Your Google Analytics account is precious because it contains your website traffic data. If you don’t know the best way to use Google Analytics then you might end up with inaccurate reports.
Follow the below article to set up goals, excluding spam traffic, filtering bots and creating multiple views for better reporting.
Google Analytics for Beginners: Configuring Google Analytics