In the previous article, we learned how to install google analytics on any website. In this article, will continues where we left off and learn how to configure google analytics. I am assuming you are up to pace with us and have successfully integrated google analytics on your website and verified its setup.
Now, it’s time to get started with configuring google analytics and fixing the nuts and bolts to generate accurate reports.
- Understanding GA Hierarchy
- Setting up Goals
- Excluding Internal Traffic
- Filter Bots and Spam Traffic
- Connect Search Console with Google Analytics
- Tracking Site Search
- Setup Automatic Emails
- Aka Annotations
- Enable Demographics and Interest Reports
- Add Another Website
Index
1. Understanding GA Hierarchy
While setting up a google analytics account for tracking website traffic, you first handedly need to understand the hierarchy and the order in which analytics Accounts, properties and views work.
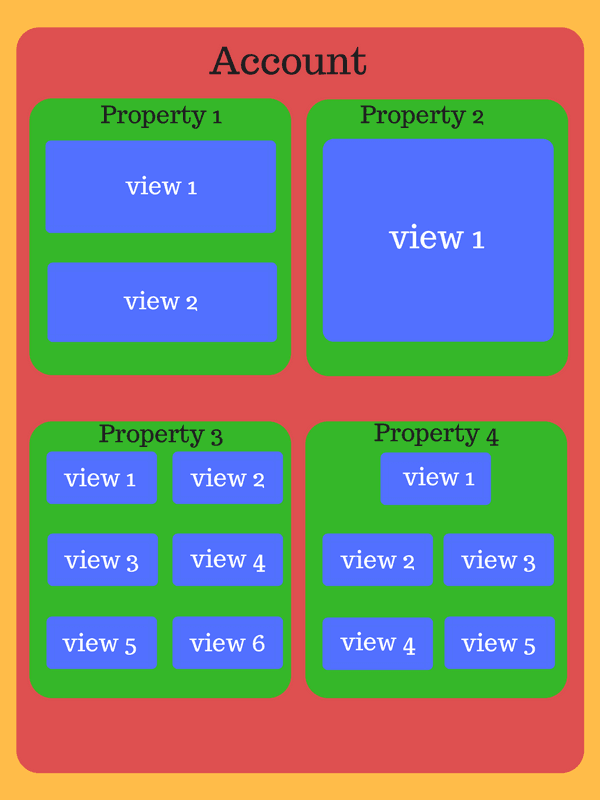
Account:
- You can have up to 100 analytics account under a single google account.
- A single account can have up to 50 properties, which means you can connect upto 50 websites to a single account.
- Each account must contain at least one property to collect your website data
Property:
- Each property can have up to 25 views.
- If you have a big business you can create multiple properties to get data separately from different devices.
- You can also create multiple properties to direct a specific region or brand data to each property.
Views:
- This is where you can see traffic data and reports.
- The benefit of creating multiple views is that you can filter data to see reports for different regions or campaigns separately.
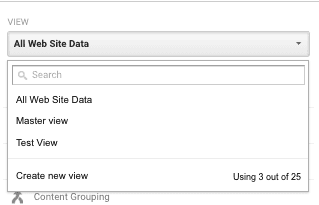
- You should always create one unfiltered view, one test view and one master view. The unfiltered view will contain all your website’s raw data, the test view should be setup for testing filters and the master data will have the filtered data that will be used for analyzation.
-
The thing with views is that they disregard any data that was collected before they were created. Each view only includes data that flows in after they are newly created.
- If you delete a view, you can restore it within the next 30 days. But you should have the admin access to delete or restore any view.
You can grant permission to other users on each level.
2. Setting up goals
Setting up goals in google analytics should be the most important step after the google analytics installation. Goals in google analytics are used to track conversions. Your website goals may include a newsletter signup or a product purchase.
For example, your website goal is to get more newsletter signups. After setting up this goal in analytics, every time a user signs up for newsletter, a goal will be completed. A goal completion is also called a conversion in analytics term.
We have already discussed in detail about setting up goals in google analytics.
3. Excluding Internal Traffic
Google Analytics, in particular, is built for tracking external website visitors. Sometimes, when you or someone in your company visits your website, a hit is counted.
This is something that is to be avoided, considering employee traffic can disrupt your analyzation reports as are they are not your actual target audience and they cannot be classified as web natural traffic.
So, you will always want to track your target audience and not your employees or yourself. To block all the hits coming from your internal sources, there is a process known as excluding internal traffic.
To exclude internal traffic you can follow any of the method below:
Exclude IP Address
To exclude an internal IP address, you have to create a filter. Do you remember in which view to create the filter first? If you don’t know, create the filter in the test view, verify if it works and then copy it to master view. Let’s create the filter in test view.
Navigate to analytics admin and select the test view.
Under view menu click on filters.
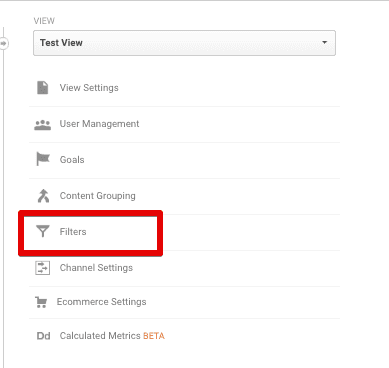
Click on Add Filter button
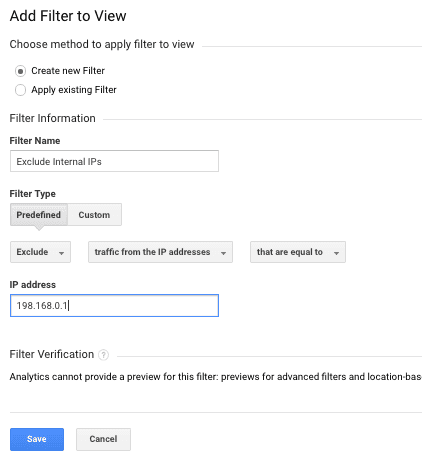
From the Filter settings, enter the filter name as “Exclude Internal IP’”, then select filter type as “Predefined”. From the filter type drop-down menu, select “Exclude”, then from select source or destination menu, select “traffic from the IP addresses” and finally select expression as “that are equal to”.
Paste the IP address(if you don’t know your IP address, go to google.com and search “what is my ip”) in the box underneath and Click save.
Once you make sure the filter works, copy this filter to the master view. This method is mostly used when you have to exclude a single IP address.
For excluding multiple static and dynamic IPs click here.
Install Opt Out Add-on
Use this method when you have to exclude multiple IP addresses or all employees from within your company. Install the google analytics opt out addon on every browser you want to exclude traffic from. This will automatically exclude any hit coming from internal IPs.
4. Filter Bots and Spam traffic
The traffic that is coming from web crawlers, bots or any other non-human source is known as spam traffic. Having a huge number of spam traffic can result in inaccurate calculations. To make future business decisions, your data should be accurate and free from any contaminations.
Whenever you create a new view, don’t forget to filter bots. To enable this in your analytics view, navigate to admin >> View >> View Settings.
This will exclude all the known bots from your website’s actual traffic.
Viewing spam traffic
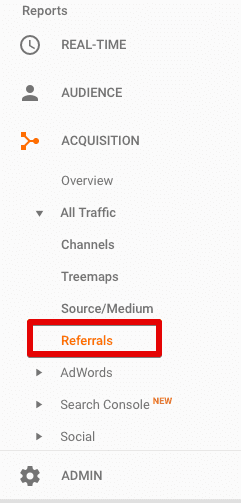
In case you ever want to monitor how much spam traffic you site is actually getting, navigate to Acquisition >> All Traffic >> Referrals.
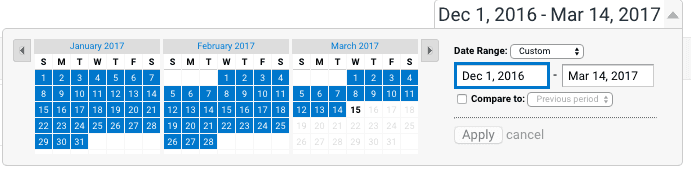
Change the date range to at least more than two months.
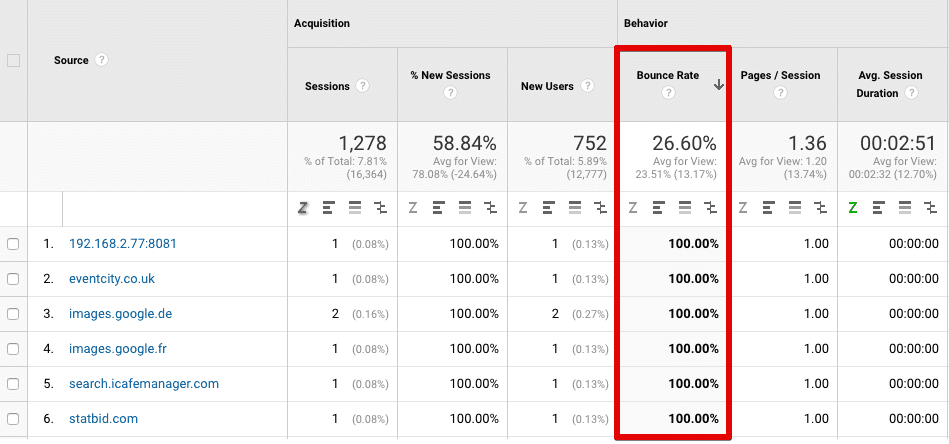
Now sort the reports by bounce rate. Click on the bounce rate column. In the reports, any source with either 0% or 100% bounce rate is a spam traffic.
To learn more about eliminating all the spam traffic from your website, read the ultimate guide to getting rid of all the spams in google analytics.
5. connect Search Console with Google Analytics
Google search console contains google search result data related to your website. This includes your website’s keywords rankings, crawl error, indexing and security updates.
You should never forget about this data if you want to stay on top of search results. You would be happy to know that you can view this data in google analytics.
Note: Make sure to verify your site with google.
Let’s move on to directing your search console data to analytics.
Sign in to your analytics account
Select the property in which you want to see search results and click property settings.
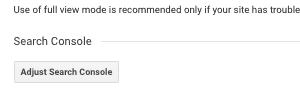
Scroll down and click on the adjust search console button.
If your website is verified with search console, you should see your site URL. In case you don’t, you might need to verify your site with google search console first.
Select the view in which you want the data to appear
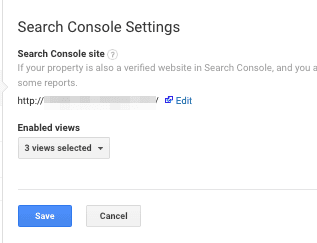
Click Save.
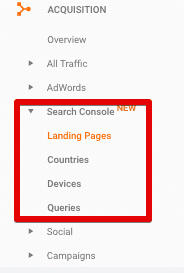
To view search console results navigate to Acquisition >> Search Console.
Few things to remember:
- The data in search console remains for the next 90 days, so the search console reports in analytics also include data from the past 90 days.
- The data search console collects from search results will appear in analytics after 48 hours. So if you want to see the latest data to the date, go to your search console.
You can understand more about using search console reports here.
6. Tracking Site Search
The beauty of google analytics is that you can track anything on your site, even a search bar. Using site search data you can:
-
Get ample amount of long tail keywords
-
Come up with new content ideas
-
Get to know what your audience is searching for
-
Improve your site’s SEO
To set up site search in google analytics, follow the steps below:
-
Sign in to your analytics account and select the view in which you want to see the search results.
-
Go to view settings
-
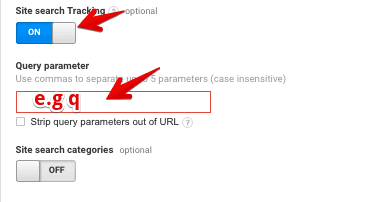
Enable the site search tracking
- In the query parameter box, add the words which belong to an internal query parameter. Query parameters might be categories, terms or tags on your site that are attached to the URL when searched. You can check for these queries and add upto 5 of them in the box.
- Select the check box if you want to strip query parameters from the URL.
6. Click save to finish.
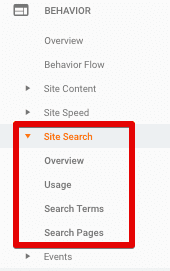
How to view the site search data
To view site search terms, navigate to Behavior >> Site Search.
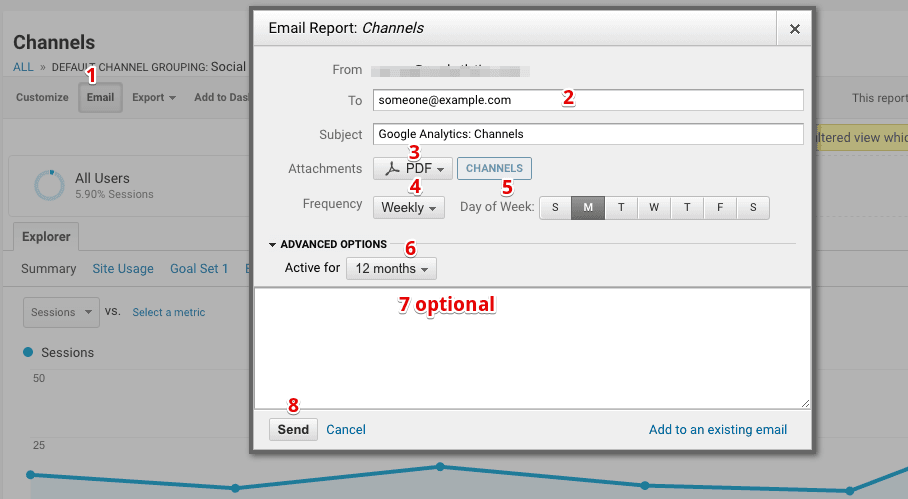
7. Set up automatic emails
Email feature comes in when you have to share daily, weekly, monthly or quarterly reports with your clients or higher officials. You can either create a dashboard including the most important reports, then either send this dashboard via email or each report separately.
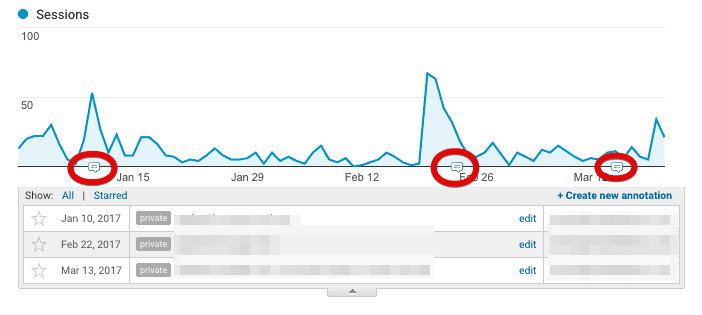
8. Aka Annotations
Annotations in google analytics are powerful yet the most forgotten feature. This helps you keep notes within your analytics reports and understand spikes in traffic and unusual changes.
Types of Annotations
Shared Annotations:
Is visible to any other person having access to the reports.
Private Annotations:
Only visible to you.
How to add annotations
To add an annotation open the report containing the line chart.
Click on the small button with an inverted triangle at the bottom of the chart
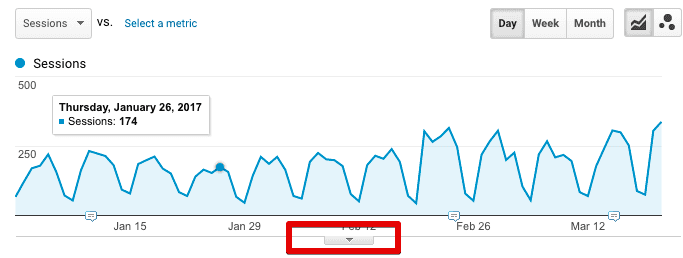
click on the create new annotation button.
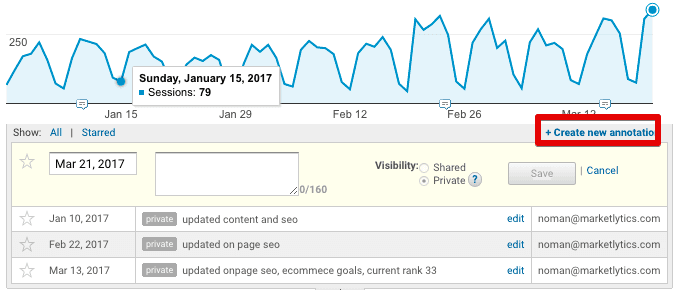
Now you can keep notes about important events and create as many annotations as you need.
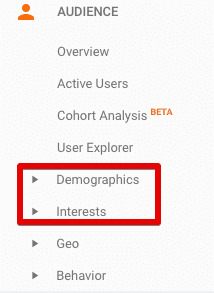
9. Enable Demographic and Interest Reports
Demographic and Interest reports display age and gender of your audience along with interest they exhibit during their online purchasing activities.
This data is not available when you set up google analytics for the first time. You will have to enable demographic and interest feature from your analytics account.
To enable this feature in analytics, navigate to the property in which you want to see your audience demographic data.
From below the property menu, click on property settings and scroll down to Advertising features and switch on the demographic and interest reports button.

This will take upto 24 hours to fetch data into your analytics account. To View demographic and interest reports navigate to
To read and understand more about demographics and interests reports click here.
10. Add Another Website
If you have understood the structure of analytics defined above, you should be able to connect a new website to your existing analytics account.
You know that you can add upto 50 properties in a single account, that means 50 websites. To add a new website, navigate to admin, select the account, from the property dropdown click on add a new property option.
This will then display a form to fill data about your new website. Get the tracking code and paste in your website. If you want to read the step by step instructions click here.
Note: If you have setup google analytics with https and your website is https, you might see an increase in direct traffic or lose in referral traffic. To fix this issue read this: Going https to https: Be Sure Google Analytics Track Referrals
Until now you have learned to configure google analytics. Try to apply this. In the next article, we’ll cover different google analytics reports and explore some more of the hidden features. If you find anything confusing in this article please let me know in the comments below. Also, don’t forget to signup for the newsletter to receive our next article advanced guide to google analytics.