Over the years, software engineering has evolved substantially. The main aim has always been to streamline the whole process, from start to end, to make it as efficient as possible. This has given rise to a new kind of mindset; the DevOps mindset. This approach’s goal is to overcome the divide between the developers and the people who manage the infrastructure (Ops).
This push towards a streamlined DevOps integration has forced organizations to restructure their workflows and made them opt for platforms with native support for Continuous Integration/Continuous Deployment support like Jenkins, Circle CI, GitLab.
Here at MarketLytics, we are also a fan of the DevOps approach and use GitLab for managing all our code, which comes with robust CI/CD support. Big users of Google’s Cloud ecosystem, we have been playing around with automating our deployment workflow through GitLab. You can check our work on it by clicking here.
Here, we will demonstrate how you can push our code to GitLab and have it automatically deploy on Google Cloud Function. A lot of credit for this guide also goes to Google’s excellent documentation which helped us string the pieces together.
Assumptions
- You already have a GitLab project that you want to deploy to a Google Cloud Function. If you don’t, you can refer to this guide. To deploy to Google Cloud Function, you need to have the required code files. We will be deploying a Python script so we have two files,
- main.py – the Python script
- requirements.txt – the list of Python packages that are required by the Python script
- You already have a Google Cloud Function that you want to integrate with GitLab. If you don’t, you can refer to Google’s excellent Quickstart guide over here
Setting Up
Set up Google Source Repository
Google Cloud Source provides fully managed private Git Repositories with integrations for continuous integration, delivery & deployment and allows you to import source code from a variety of repositories or cloud storage spaces, including GitLab. We are going to use this to mirror our GitLab repository using this guide as a reference. Here is how you can set it up,
- Open Google Cloud Shell. (Remember to select your Google Cloud Project from the dropdown list above)
- Make sure you are using the correct project using the following command,
| gcloud config get-value project |
This should show the project id. If the project id isn’t correct, run the following command,
| gcloud config set project <PROJECT-ID> |
- Enable Cloud Source API using the following command,
gcloud services enable sourcerepo.googleapis.com |
- Create a Git Repository in Cloud Source Repositories using the following command,
gcloud source repos create <repository-name> |
This will create a mirror repository over on Google Cloud Source. You can give any name over here. For example, we are going to replicate our GitLab repository called slack-bigquery-function so we are going to name this repo slack-bigquery-function-mirror.
Generating Static Credentials
Now, we are going to generate Static Credentials that will allow GitLab to mirror our repository’s changes over to Google Cloud Source. Here is what you need to do,
- Open the page for Google Cloud Source to see the list of all repositories.
- Click on the repository you just created to open it.
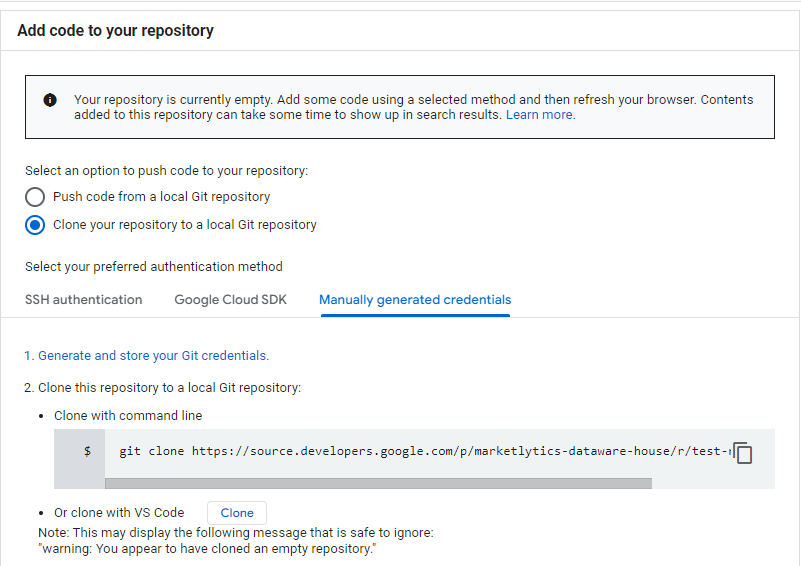
3. Check the box for Clone your Git repository to a local Git repository, open the Manually generated credentials tab. Click on Generate and store your Git credentials.

4. It will ask you to authorize and approve this application.

5. Once you approve it, it will take you a to new Configure Git page that looks like this,

6. Copy the highlighted text(in blue) and paste it all in the Cloud Shell console (Ctrl + Shift + V).
7. Paste the following command in the console and press Enter,
| grep ‘source.developers.google.com’ ~/.gitcookies | tail -1 | cut -d= -f2 |
This will show you the password you have to configure in Git. Store it somewhere for now.
8. Now, paste the following command in the console to store the username in the CSR_USER environment variable,
| CSR_USER=$(grep ‘source.developers.google.com’ ~/.gitcookies | \ tail -1 | cut -d$’\t’ -f7 | cut -d= -f1) |
9. Next, paste the following command but change the repository name here to your repository,
| CSR_REPO=$(gcloud source repos describe repository-name –format=”value(url)”) |
10. Finally, paste the following command,
| echo $CSR_REPO | sed “s/:\/\//:\/\/${CSR_USER}@/” |
Thi will show you the URL you have to configure in Git.
Now, you should have these two values,
- Password
- URL
You just need these two to configure on your GitLab Project.

Configure GitLab Project
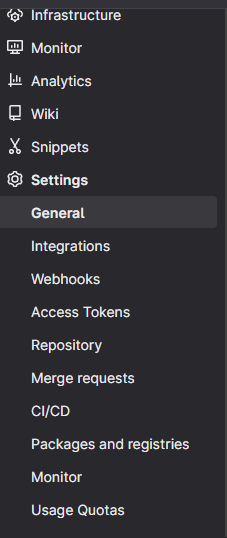
- Sign in to GitLab and go to your project.
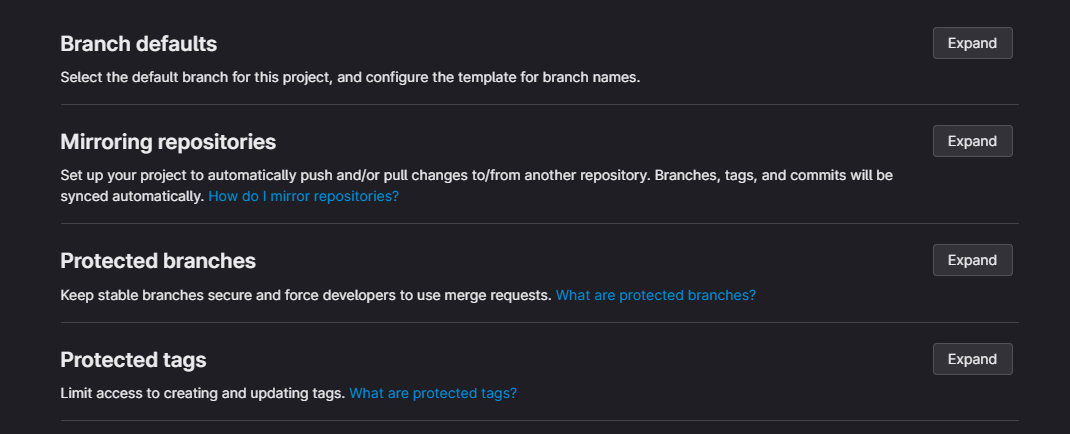
- In the left pane, click on Settings and then click on Repository.

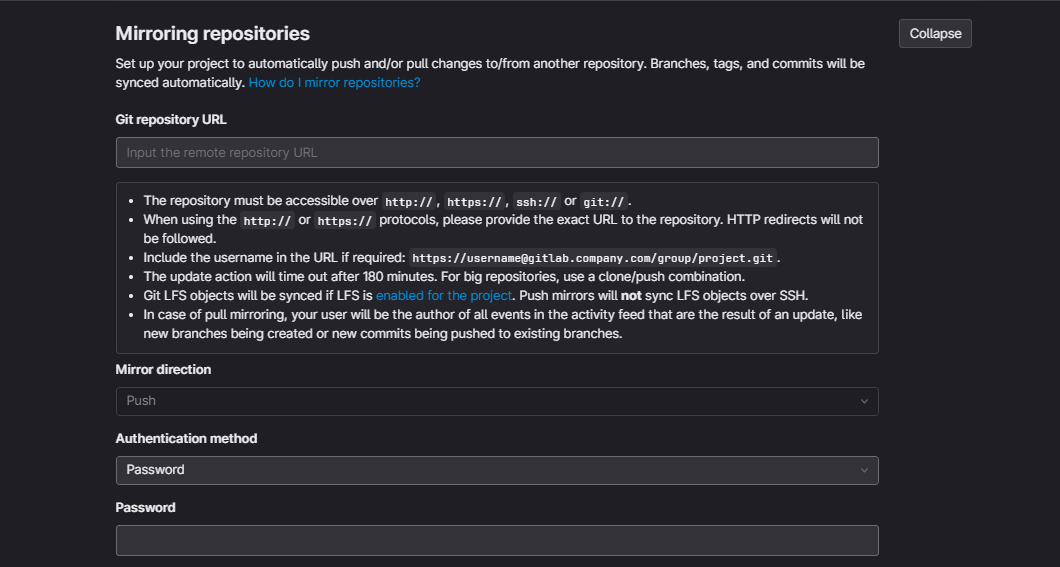
- Click on Expand for Mirroring repositories.
- Here, you need to paste the URL in the Git repository URL field. Paste the Password in the Password field. For all the other options, you can go with default settings like Mirror direction as Push and keeping the checkboxes unchecked.
- Once you are done, click on the Mirror repository option.
That’s it. If you have done it correctly, you should see it listed in the list of Mirrored repositories below.
Now, every time you make a change to this repository, it should be reflected across to your Google Cloud Source repository. You can also click on the little Refresh icon to sync it manually any time you want to.
You can verify that the changes are being reflected across by pushing to your GitLab repository and then going to your repository on Cloud Source to check if the changes are being reflected there. Once you have successfully established this, you can move on to the next part of the guide.
Continuous Deployment Using Cloud Build
Cloud Build is a service that executes your builds on Google Cloud Platform’s infrastructure. We are going to use this to do continuous deployment to Google Cloud Function using this guide as a reference.
Enable Cloud Build APIs
- Enable the Google Cloud Function API.
- Open the Cloud Build Settings page and enable the following APIs,
- Cloud Functions
- Service Accounts

This will allow Cloud Build to deploy the Cloud Function using your service account.
Create a Cloud Function
Here, we have described the process to create a basic HTTP-triggered Cloud Function. For our process, we have created a cloud function already that we are going to integrate with GitLab and update using push commands directory.
- Go to the Create a Google Cloud Function option menu.
- Enter the function name and preferred region.
- For Trigger type, choose HTTP.
- For Authentication, choose Allow unauthenticated access. For more security, you can also choose Require authentication but this will restrict your function in terms of accessibility. We suggest going with Allow unauthenticated access for testing purposes and changing it later to restricted.
- Once in the Code Editor, you can click on Deploy to create a function.
Create Cloud Build Configuration File
You can create two types of Cloud Build Configuration files – these files describe the commands Cloud Build needs to execute to deploy your Cloud Function.
- YAML File
- JSON File
We aren’t going to go into the details of these files. We will just create a simple YAML file that describes the process to deploy the code to an already created Cloud Function (make sure to input the correct space indentations),
| steps: – name: ‘gcr.io/cloud-builders/gcloud’ args: – functions – deploy – [FUNCTION_NAME] – –source=. – –trigger-http |
Replace the [FUNCTION_NAME] with the name of the Cloud Function you are going to use and save this file as cloudbuild.yaml. This file provides tells Cloud Build to use the gcloud command-line to deploy the Cloud Function with the following arguments,
- source – used to describe where the main code is in the working directory. A . means that it is in the current working directory.
- trigger – describes how you want the function to be triggered
Just add this file in your repository root folder.

Set Up Continuous Deployment
Now, you just need to execute the final step to set up a Cloud Build Trigger which can detect a new push to a specified branch and automatically deploy it to the Cloud Function.
Here’s how you can do it,
- Go to the Cloud Build Triggers page.
- Click on Create Trigger.

- Specify a name and description, select the Event as Push to a branch. In the Source, select the repository you created earlier. You can also specify the Branch. In our case, we want to deploy only when a push is made to the master branch.

- Scroll down, select the File type as YAML and click on CREATE.
That’s it. You have successfully set up a complete Continuous Deployment Workflow.
You can test this by making a change to your code and pushing it to the master branch. You should see the changes reflected on your Cloud Function code.