Looker Studio Community Connectors are community developed connectors that enable access to a variety of data sources directly from within looker studio. Using a Community Connector, we can pull in data and use them in our reports and dashboards. A Connector can pull in data from sources like social media platforms, search engines, advertisements statistics, public or open data sets, private company data, and any source of data which can be accessed using Apps Script.
In this blog post we will be learning how to create a Currency Exchange Rates Community Connector from scratch.
Prerequisites:
- Get the API Key for the source (if required). We will be using API from Fixer.io which has a public API so we do not need an API Key
- Request Developer Access from Google to deploy Community Connector. This may take few hours but without having Developer Access, we can’t deploy the connector.
Step 1: Setup Apps Script
Visit Google Apps Script. This is a scripting tool where we will be writing our code. Create a new Project. Delete everything from Code.gs file.
Step 2: Create Skeleton
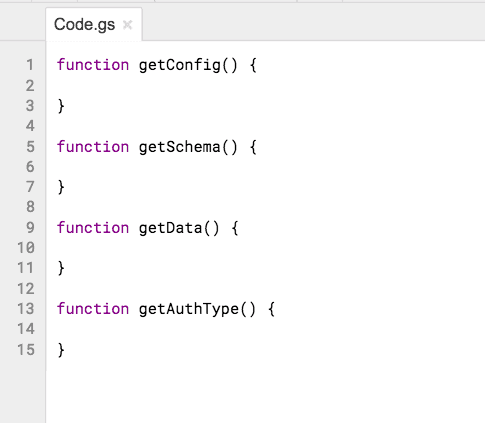
Next we will create the skeleton of the connector. Every connector has 4 required functions.
- getConfig() // For any user defined configs
- getSchema() // To get the schema for any request
- getData() // Fetch and return data for any request
- getAuthType() // Identify the authentication method
Step 3: Defining Configs getDate()
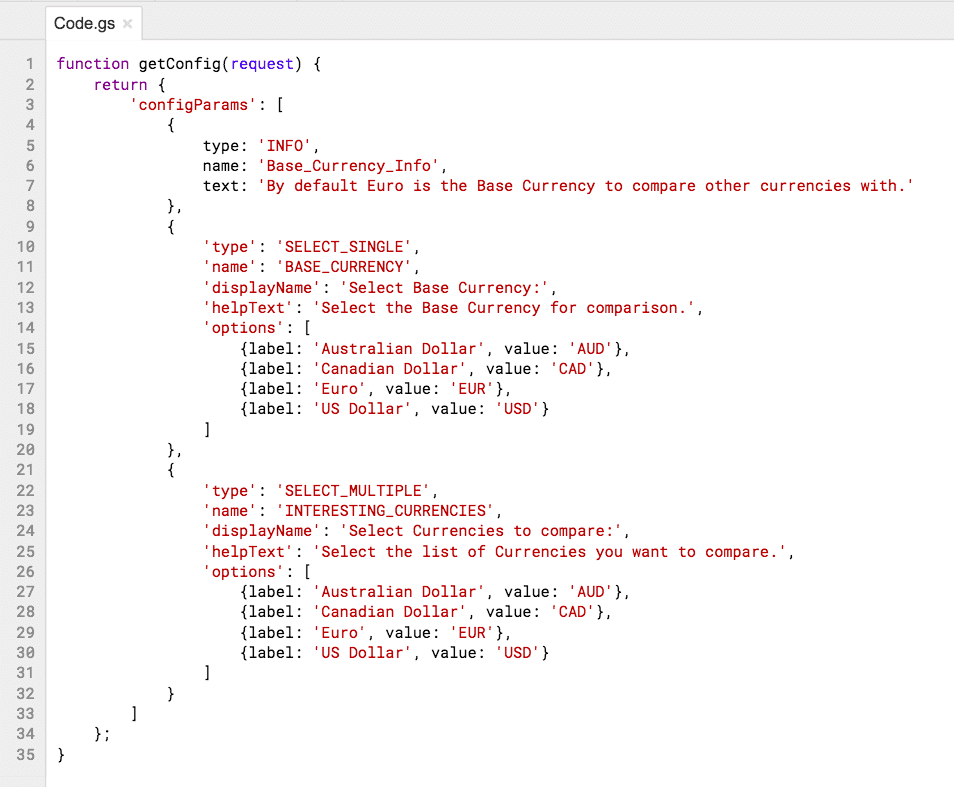
We will define our configurations in the getConfig function of the connector. We can have multiple configurations as per our needs. For our connector, we will display an information message and ask for base and interesting currencies of the users. We can take user’s input in the form of text, multiline text, single and multiple select. Our configuration looks like this:
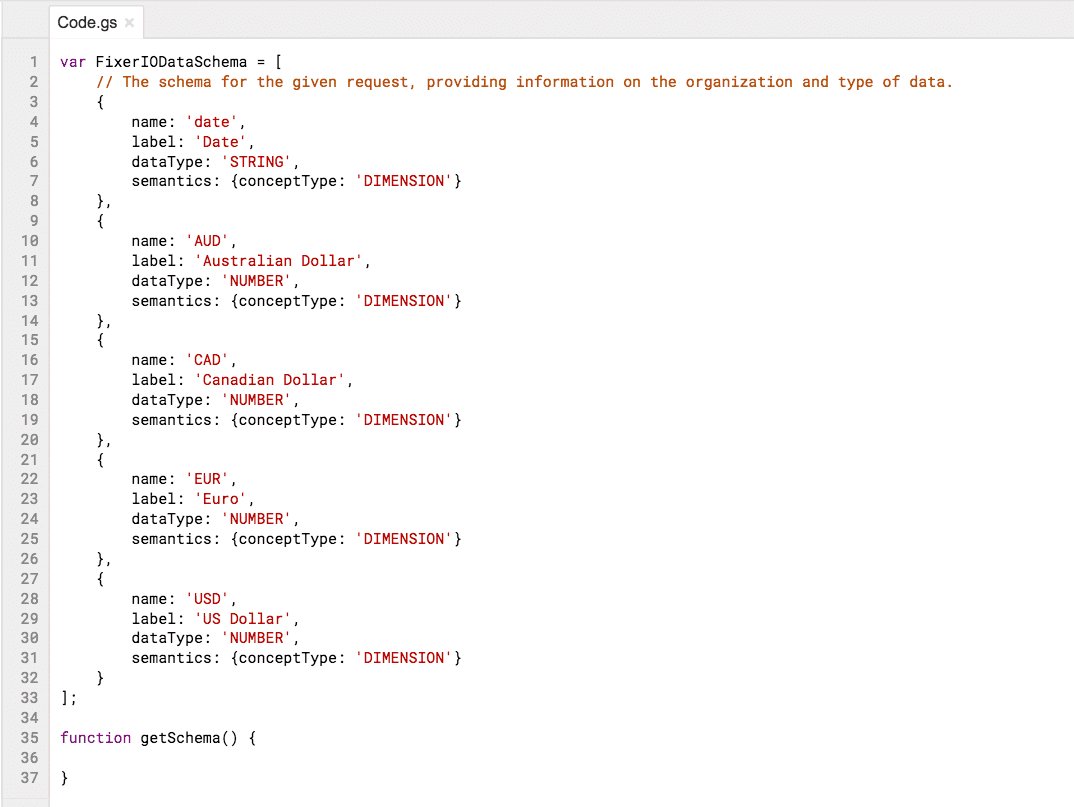
Step 4: Defining Schema getSchema()
We will define our data schema for any given request in the getSchema function of the connector. This is typically an array of objects. We can also make use of the inputs from users which will be available in the request.configParams property which we will get as the parameter of this function. As per your requirements, the schema can be fixed or may be provided dynamically at the request time.
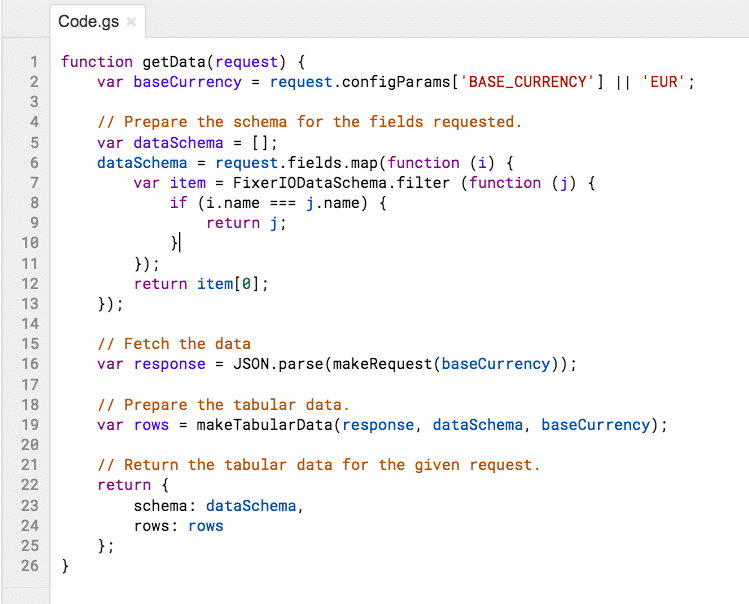
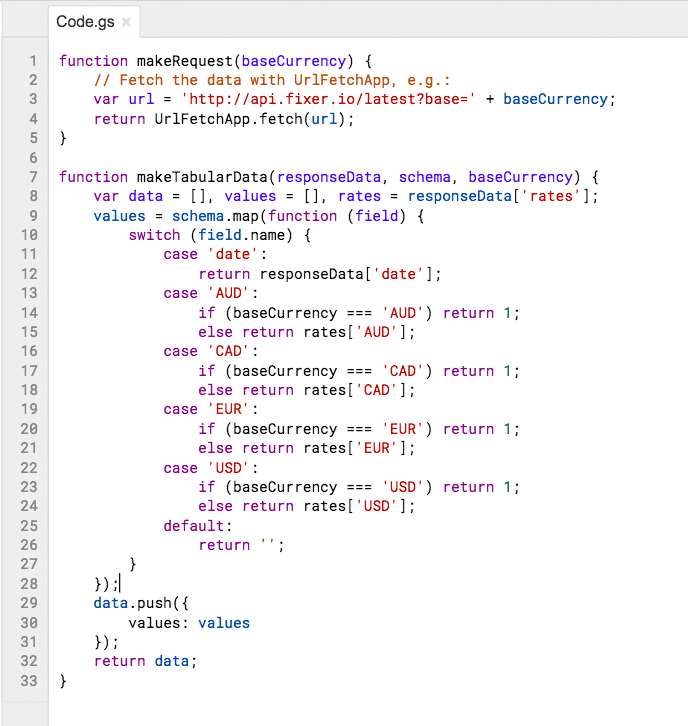
Step 5: Fetch the data getData()
This is a function where we will make our API call and fetch the data from any given source. Once the data has been fetched, we will configure or parse it according to the schema and return it back in an object form with the schema.

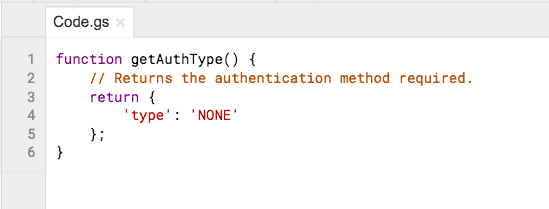
Step 6: Setup authentication
This is a function where we will define our authentication, if any. In our connector we do not need any authentication so we return ‘NONE’ here:
Few Notes:
- Apps Script does not support ES6 as of now
- Field name can’t contain - or _ in the schema
- Names of four key functions must be as they have been described above
Step 7: Complete the project manifest
Click on View > Show manifest file to open it. Please note that you need Developer Access to see this option in apps script. Add the name and other details to your manifest file and save it. Required fields are name, logoUrl, company, companyURL, addonURL, supportURL, and description.

Step 8: Deploy the connector
Save your Apps Script project. Click on Publish > Manage Deployments. The click on Get ID and open the link.

Step 9: Use the connector in Looker Studio
Configure the connector by providing the necessary fields. Grant authorization and then click Connect on the top right corner.
Complete code for this connector is available here: https://goo.gl/r1W3df
Looker Studio Community Connector a powerful tool to pull the data in desired form and then be displayed in the form of reports, or dashboards using Looker Studio. Here is how we built our first community connector for project management data.
