Tracking a button click in Google Tag Manager is one of the simplest things you can do as someone who’s even remotely familiar with it. However, if you’re new to tag manager, this can prove to be a tedious task. To help you get started with event tracking in GTM, I have compiled below, a detailed walk-through tutorial to act as your guiding light.
Follow each step carefully if you are new to GTM.
Now then, let’s get started.
Why Tag Manager?
Google Tag Manager is a complete tag management solution. It has the power to control all analytics and marketing tags on your site without as much as touching your website code.
This allows you to control all tags from a single place, on top of eliminating the struggle of modifying your website code every time you have to install a new tag.
More importantly, it helps improve your website speed by calling all the external files at a time without waiting for other tags to load.
Getting Started with Tag Manager
Installing the tag manager on your website is remarkably easy. However, if you still need a guide to get you started, you can refer to my previous blogs in which I have covered this topic extensively. Now, I will take you through the steps for installing Google Tag Manager.
- Create a Google Tag Manager account by typing https://tagmanager.google.com in your browser
- Fill your website details
- Copy the GTM container code
- Place the container code in the head section of your website
- Verify the setup
This setup itself takes hardly five minutes, (even lesser on a lucky day), but, doing so will give you tons of opportunities to manage your website tags. For the WordPress site owners, you can follow this awesome guide to install google tag manager on wordpress.
Before you Start
Before getting started with tracking anything, it is necessary to look around the Google Tag Manager interface especially if you haven’t used it before. To have a brief overview of the tag manager interface you can go through the step by step guide to Google Tag Manager.
To track a button click, log in to your tag manager account and select a specific container.
The very first thing you need to do after logging into your account is to enable all the built-in click variables.
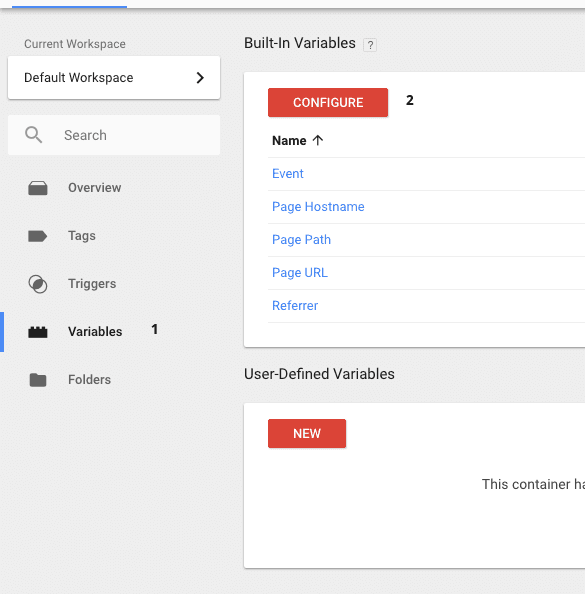
To do so, click on variables from the left menu, and under built-in variables click configure button.
Under the configure built-in variables scroll down to see click variables and check all of them.
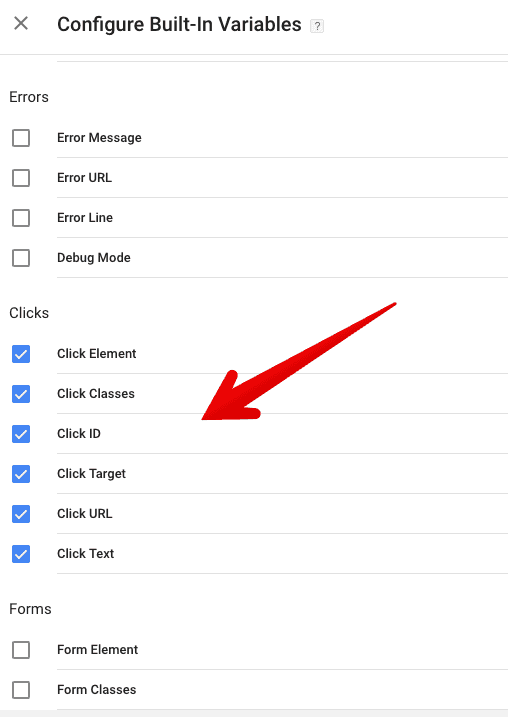
Once, you have enabled the click variables you’ll need to create a trigger.
3 Ways to Create a Trigger
A trigger condition evaluates during runtime. You can track a button by assigning it a unique id, a class or by using the button text.
The best way to follow is using the button id. If the button isn’t assigned any ID, look for a class and if it isn’t assigned one either, go with the last option.
In this article, I will show you all three ways to create a trigger, but for now, let’s go with a generic trigger to check the properties of the button.
From the right menu, click triggers and then click the new button.
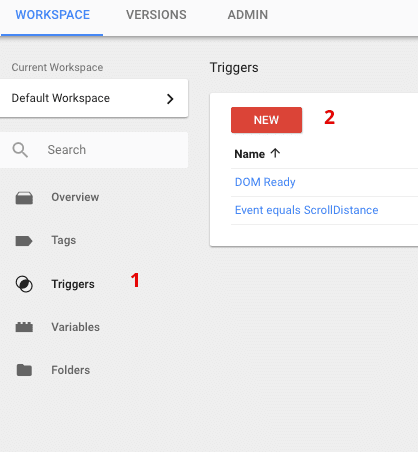
Enter the trigger name as “generic trigger”
Click the trigger configuration and select “all elements”
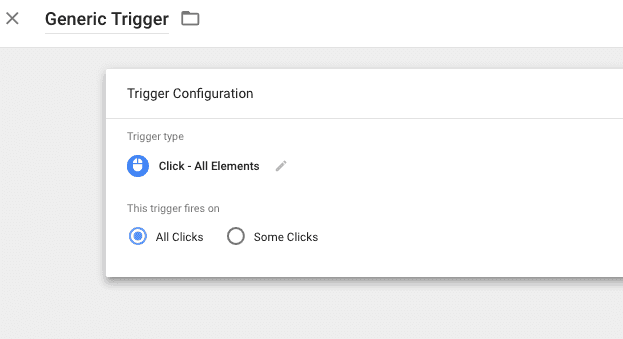
Save this trigger. Click the preview button and open your website in a new tab

When you open your website you will see a tag manager preview at the bottom of your page.
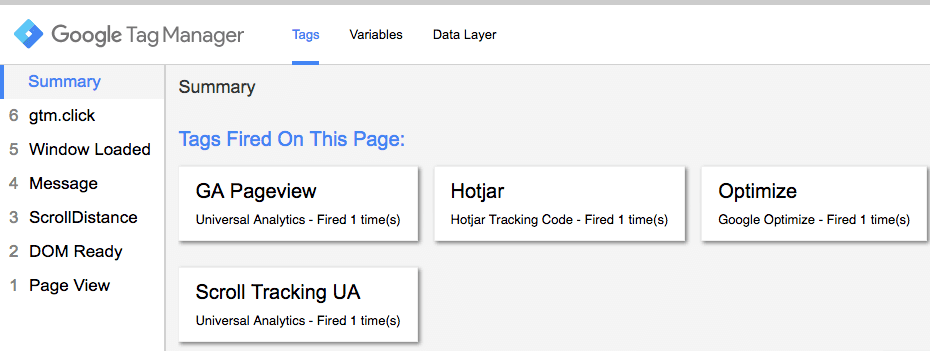
Press the command/ctrl button and click the button you want to track.
In the original tab, you will see a new element under summary.
Click the variables tab to see the variables associated with your button.

Check the values for click id, click classes and click text. Our priority for each of them is going to be in the same order as well.
In my case, there is no value for click id, so I will look for click classes. I can see the button has a class named “item-readmore” and then click text is “READMORE”.
Now that we have got the right information, it’s time to modify the trigger we created earlier.
We will see how to create a trigger based on click id, click classes and click text.
If your button is associated with an id, copy it and if not, copy the value of click classes and in neither cases, copy the click text value.
Go to your tag manager account and open the trigger we created earlier.
Change the name of the trigger to what you want it to track. In my case, I will name it Read More.
1. Using Button ID
In the first case, that is if your button is associated with an ID, follow the steps below.
From trigger configuration, change ‘All clicks’ to ‘some clicks’.
From the drop-down select click id and in the last text box paste the id value of the button you copied earlier.
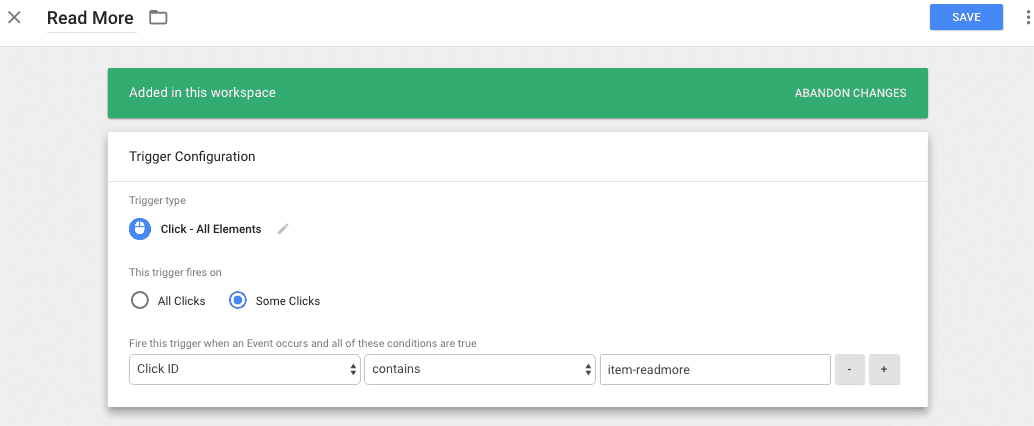
Save the trigger.
2. Using Button Class
If your button is associated with a class, follow the steps below.
From trigger configuration, change ‘All clicks’ to ‘some clicks’.
From the drop-down select ‘click classes’ and in the last text box paste the class value of the button you copied earlier.
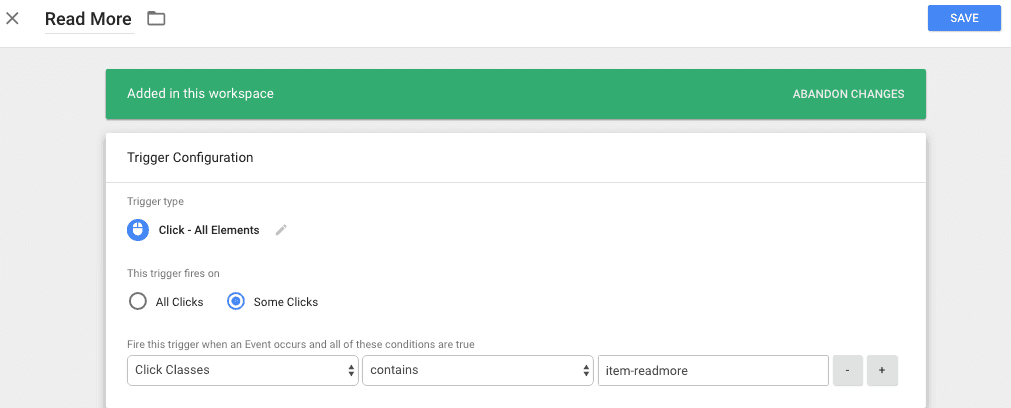
Save the trigger.
3. With Click Text
In case there is no id and class associated with the button, follow the steps below.
From trigger configuration, change ‘All clicks’ to ‘some clicks’.
From the drop-down select click text and in the last text box paste the button text you copied earlier.
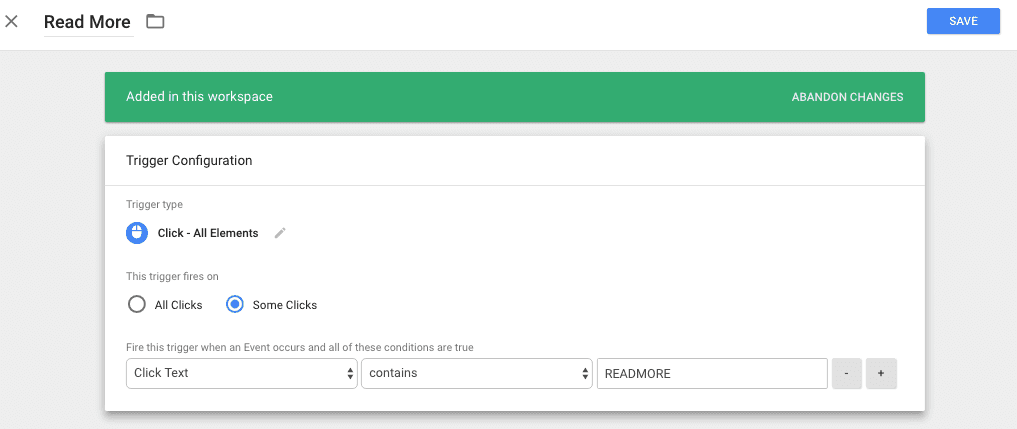
Save the trigger.
Create the Respective Tag
Now it’s time to create the tag that will fire once the trigger condition mentioned above is met.
Click on the tags tab from the left menu and then click new button to create a tag.
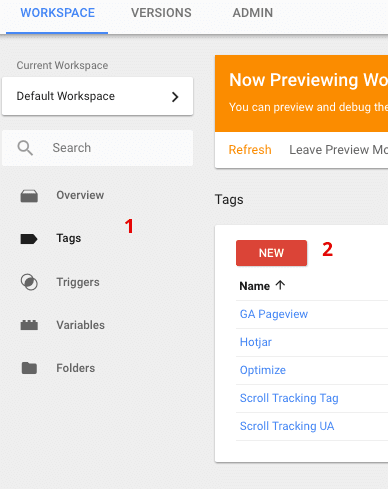
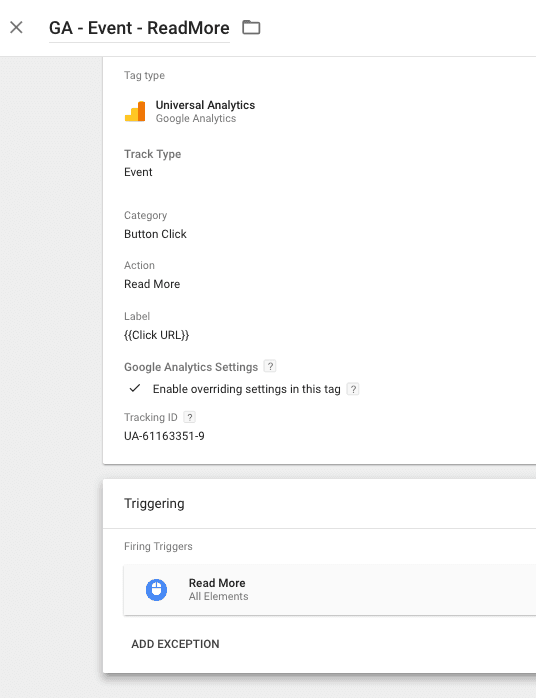
Enter the name of tag as “GA - Event - ReadMore”. You can change “readmore” to the button you are tracking.
From tag configuration, select “Universal Analytics”.
Select the track type as 'event'.
Set your event parameters. You can set unique parameters so you can easily identify in Google Analytics reports.

Change the values of category and action according to your requirements. I selected the label as click URL because it will display the URL of the page where the button was clicked.
Also, change the google analytics tracking id.
Under the tag configuration, click on the trigger area and select the trigger we created earlier.
Save the tag and refresh the preview mode.
Open your website in a new tab to verify if the tag is being fired properly.
Press Command/Ctrl button and click the button you want to track.
If you did everything right you will see that the tag is being fired successfully, otherwise go through the steps again to make sure you didn’t make any mistake.
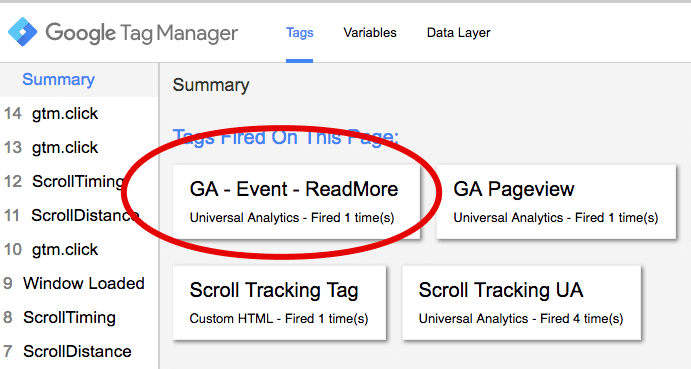
If the tag is fired successfully, go back to tag manager account and click the leave preview mode button and then click ‘publish’. Your changes won’t go live until you publish the changes.
To view event reports, open your Google Analytics account and navigate to Behavior >> Events >> Overview. You can then create an event goal in Google Analytics to check the conversion rate.
What's Next?
Google Analytics Event Tracking with Google Tag Manager
- outbound link tracking
- Form submission tracking
- PDF download tracking
- Scroll depth tracking
The Ultimate Guide to Google Tag Manager Environments


