If you are a Google Tag manager rockstar, you definitely know that it requires a good understanding of HTML, DOM, and JavaScript. The next learning triangle in GTM are Tags, Triggers, and Variables.
If you are good at Tags, Triggers and Variables, you can do wonders with GTM. But the core feature of Google Tag Manager is the DataLayer. It is where the data is available and variables are used to save data from datalayer.
In this article, we will talk about pulling ecommerce data from the datalayer using datalayer variables. This article will save the day for anyone who has implemented enhanced ecommerce in Woocommerce or Facebook conversion tracking via GTM.
I will be focusing on capturing datalayer values to pass as event parameter values for Facebook conversion tracking.
Push Ecommerce Values to DataLayer
The first thing you will have to do is to push the required details to datalayer. For an ecommerce site, you will have to push data the way you want to see in your reporting tool. I am not going to explain how to push data into datalayer because this includes interaction with the website code and you might have to take the risk of bugging your anti-social developer.
So I will focus on the less risky part, which is pulling data from the datalayer. If you have a Woocommerce website and are using Google Tag Manager plugin for ecommerce tracking then it automatically pushes data to datalayer.
Let’s start with the actual process.
Know the DataLayer Variable
DataLayer is a virtual layer on your website where the most useful data is stored. This data includes the page path, page URL, click classes..etc. You can capture useful data from datalayer and send to tools like Google Analytics and Facebook Pixel.
Let’s understand how we can capture the datalayer values for ViewContent event pixel and pass them as parameter values. If you are new to Facebook Pixel, we have got you covered. Read here.
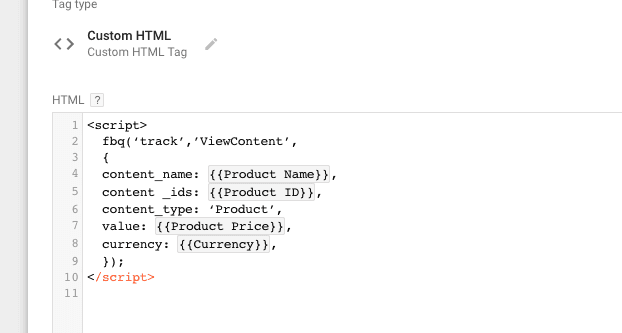
Below is the JavaScript code for the viewcontent event.
<script>
fbq(‘track’,’ViewContent’,
{
content_name: {{datalayer variable}},
content_category: {{datalayer variable}},
content _ids: {{datalayer variable}},
content_type: ‘Product’,
value: {{datalayer variable}},
currency: {{datalayer variable}},
});
</script>
If you look at the above code, the parameter values contain datalayer variable. We will have to create a separate datalayer variable for each parameter.
To capture datalayer values, you will have to install datalayer inspector chrome extension. Next, you should have a little knowledge about the inspect element and console.
Here I am assuming that you have pushed the required data to datalayer.
Open your website in a tab and view a product.
Right click on the page and click inspect.
Click on console section and look for datalayer.push – ecommerce data
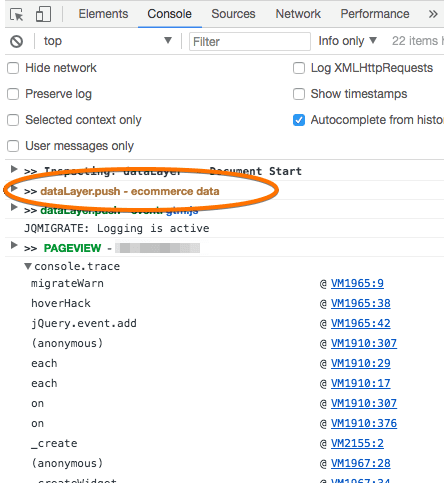
Click on the arrow to view the details.
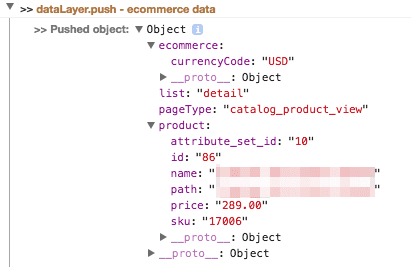
As you can see in the above image, the details we require. We have all the info available on the datalayer.
Pull Ecommerce Data From DataLayer using DataLayer variable
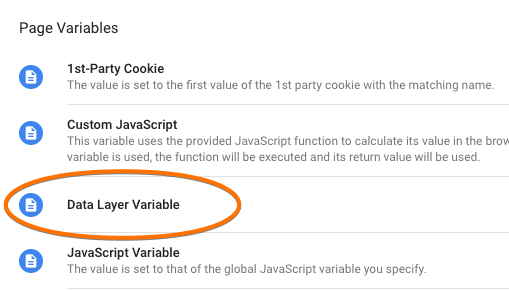
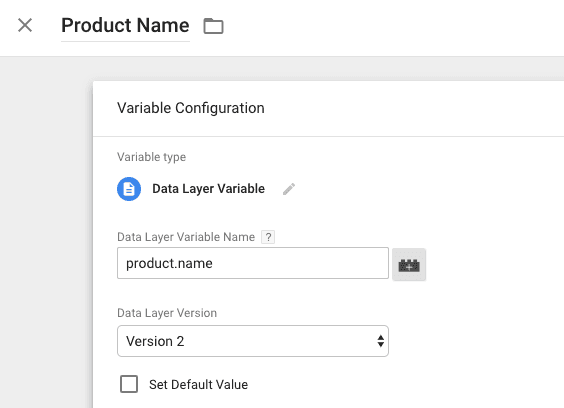
Go to Google Tag Manager and navigate to variables. Within variables create a new user-defined variable. Select the variable type as datalayer.
Enter the variable name as Product Name, and enter product.name in the name field.
Similarly, create other variables Product ID, Product Price, and Ecommerce Currency.
There is no product category data available so we can skip this and hence its an optional parameter as well.

Now, navigate to your ViewContent tag and change the parameter values like below.
This same will be applied to the AddToCart event. Because both these events include a single product interaction so single product details goes to datalayer.
InitiateCheckout and Purchase events are critical because it contains multiple products.
Suppose a customer has added five products to the cart and on the checkout page, he has five items. So the method we used for capturing product details for ViewContent will not be useful here.
Add multiple products to the cart and then proceed to checkout. Open console and see how how data is displayed in datalayer.
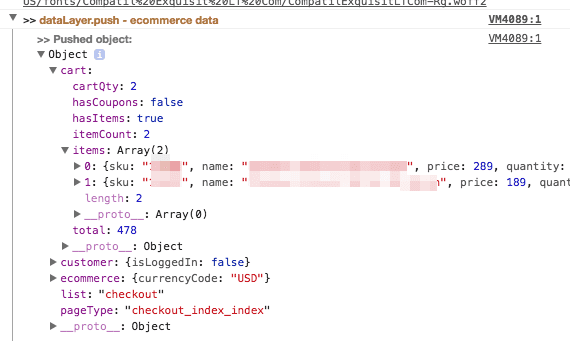
Now if you can see we have two items in the cart. How can we capture items in an array?
Here we will need to create the following variables: total products in the cart, checkout product id, product name, and total price.
Let’s see how we can create the variables by looking at the data displayed in the image above.
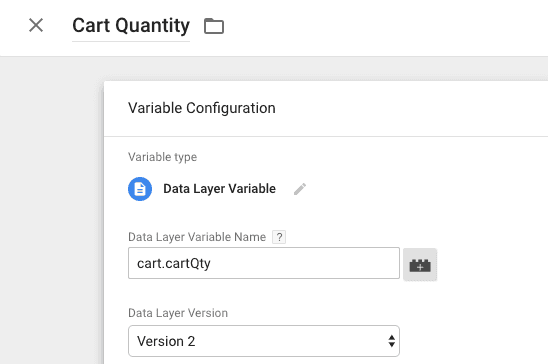
Go to GTM and create a new datalayer variable for cart quantity.
Create another variable for cart total price.
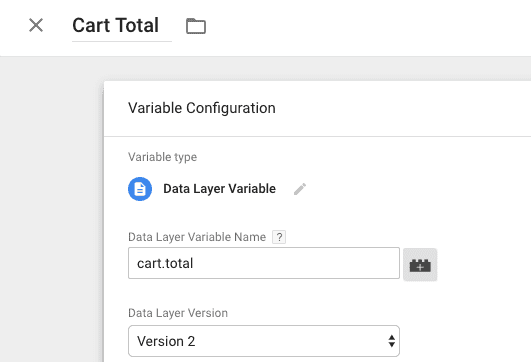
The third variable you will create is the cart items. This will contain the items of the cart.

Navigate to tags section, and create a new tag for InitiateCheckout. You can simply copy and paste the below code.
<script>
 jQuery(document).ready(function()
 {
  var Checkoutlen = {{Cart Quantity}};
  var checkoutID = [];
  var productName = [];
  var i;

  for(i = 0; i< Checkoutlen; i++)
  {
    checkoutID.push({{Checkout Items}}[i].sku);
    productName.push({{Checkout Items}}[i].name);

  }
   <!-- Facebook Pixel Code -->

    fbq('track', 'InitiateCheckout', {
      content_ids: checkoutID,
      content_name: productName,
      content_type: 'product',
      value: {{Cart Total}},
      currency: 'USD'
    });

    <!-- END Facebook Pixel Code -->
     });
</script>
Now, this captures any number of items in your cart. This will make it easy to send dynamic parameter values for each product.
Similarly, you will have to do for the purchase event. The difference is you will be picking the purchase values from the thank page after a product is purchased.
The datalayer variables you will be creating for this event will be order length, and order total. You will set the parameter values using the method displayed for initiate checkout.
How will the data be displayed?
Once you pass the datalayer values, you can then test with Facebook pixel helper to verify if the data is appearing correctly.
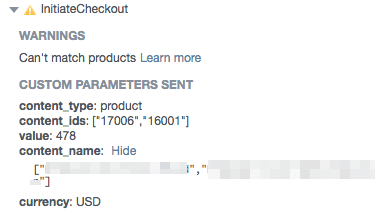
Now we can see the data is displaying correctly and we can publish changes in GTM.
The biggest benefit of passing parameters values is we can set up dynamic product remarketing. Where product id is required for dynamic remarketing.
Conclusion
DataLayer values are not only used for Facebook conversion tracking, this was just an example. The type of data displayed may vary but the same method is used for pulling data from datalayer.
Related Articles:
How to Use Google Tag Manager for Event Tracking