Facebook pixel is one of the latest analytics tools to see website traffic details. It provides a code snippet to place on the website for traffic details. Facebook pixel is fundamentally used for conversion tracking and building audiences.
Once you add the pixel code on your website, there are two ways to verify if the data is showing up or not. Below are the two methods explained:
Method 1: Install Facebook Pixel Helper
Facebook pixel helper is a browser extension that is used to verify the Facebook base pixel and conversion tracking code installations. Before installing this extension you must paste the pixel code on your website.
If you have not yet installed this extension, click here to install.
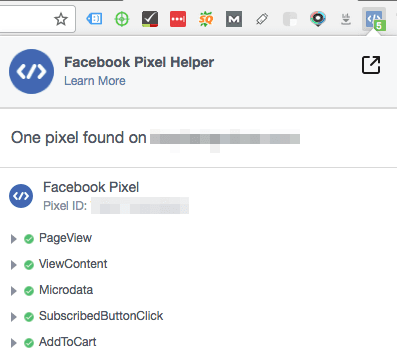
To verify the installation open your website in a new tab. If you placed the code correctly in the right place just before the </head> tag, pixel helper will display the pixel as shown in the image below.
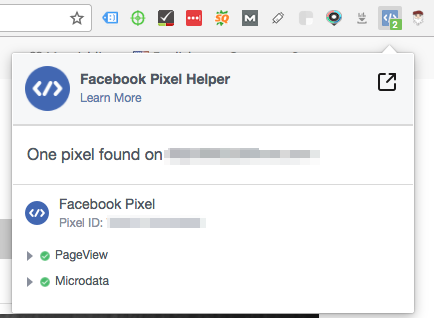
This is for the base pixel code. If you add the conversion codes it will also display in the pixel helper.
For more details related to error handling in Facebook pixel helper click here.
Method 2: View in Pixel Manager
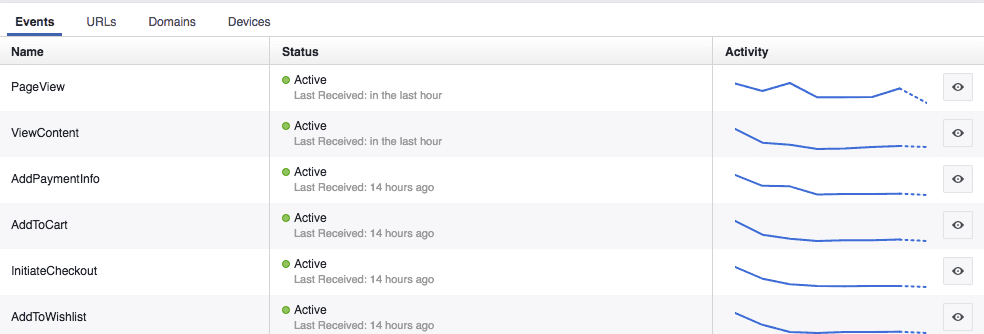
The second method is to find the place where your pixel data will be displayed. That is inside your ads manager.
To view your pixel data in ads manager click here.
If you have added the pixel codes correctly on your website, you will see the pixel data showing in your ads manager.
You will be able to see the list of standard and custom events added to your website as seen in the image below.
If you are not seeing data in any of the methods above, you need to verify that you have placed the codes correctly on your website.
If you are having trouble installing pixel code, you can read our previous guide on how to install Facebook Pixel with Google Tag Manager.