If you are looking to install Shareaholic via google tag manager, you have made the right decision. Because doing this will improve your site speed and allow you to control the plugin without having to touch your website code.
Without wasting time on less important things, let’s get started with the actual process. Follow the steps below to install Shareaholic via Google Tag Manager.
Copy Shareaholic Site ID
Step1: Create your Shareaholic account and connect your website. If you already have Shareaholic installed on your site but not via tag manager, check the code and remove the code snippet.
Step2: login to your Shareaholic account and click on my sites drop down and select the website.
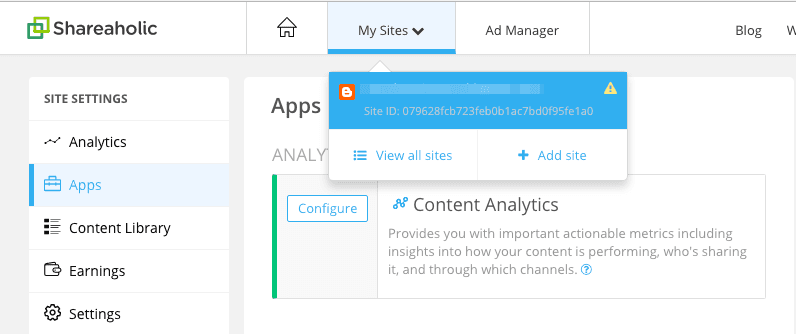
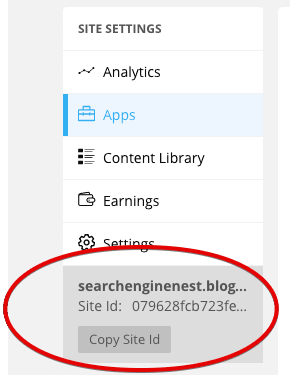
Step3: Copy your site ID from below the left menu.
Install Shareaholic via Google Tag Manager
Note: If you are new to Google Tag Manager make sure you have enabled all the built-in click variables in GTM. You can do this by navigating to variables, under built-in variables click configure and check all the click variables.
Step1: Now, open a new tab in your browser and sign in your tag manager account.
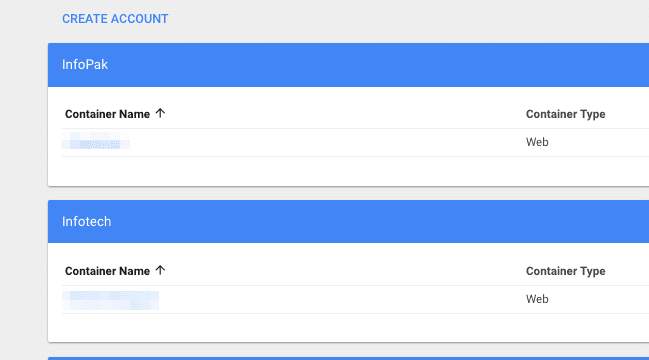
Step2: select the container in which you want to add Shareaholic.
Step3: inside your container, create a new tag. Click on the New Tag button.
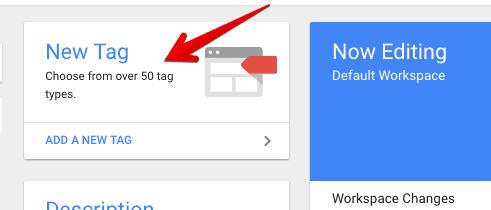
Step4: Enter the tag name as “Shareaholic” and select the tag type as “Shareaholic”.

Good Read: Complete Guide to Google Tag Manager Events
Step5: Enter the Shareaholic Site ID which you have copied earlier. Click on advanced settings and select tag firing option as once per page.

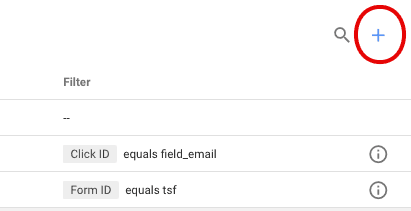
Step6: Decide on which pages to display the shareaholic plugin. Let’s say you want to add this to your blog pages only. click on the triggering area below the tag configuration settings.
Click on the plus icon on the top right of the page.
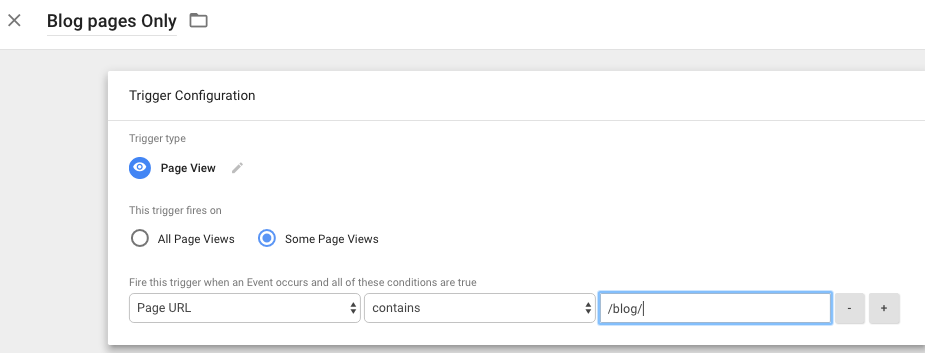
Enter the trigger title as “Blog pages only”
click on the trigger configuration and select the trigger type as page view.
choose the trigger to fire on some pages
Now you have to tell the condition. To display the plugin on blog pages add the condition as “Page URL contains /blog/”. Set the condition according to your URL type.
Note: If you want to run the plugins to some specific pages set the condition as “page url matches regex” and enter regex for the pages.
Save the trigger.
Step7: Save this tag. Preview and debug container changes and then submit to see the changes live on your site.
Now, you can view your website to check if the Shareaholic icons are hanging somewhere.
To get more tips like this, subscribe to our newsletter or follow us on twitter.