If you have come to this place, you would definitely know the importance of Google Tag Manager. It allows you to add tags to your website quickly without having to modify your website code. In this GTM guide, you will learn how to add crazy egg via Google Tag Manager with few clicks.
This guide definitely not about installing GTM on your website and if you are new to GTM you can go through this guide to install GTM on your website.
Let’s move on to add Crazy Egg via Google Tag Manager built-in template.
Step1: login to your Google Tag Manager account.
Step2: select the specific container and create a new tag.
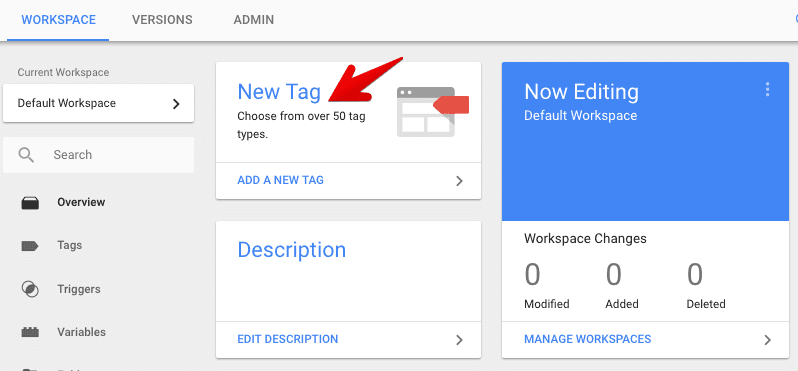
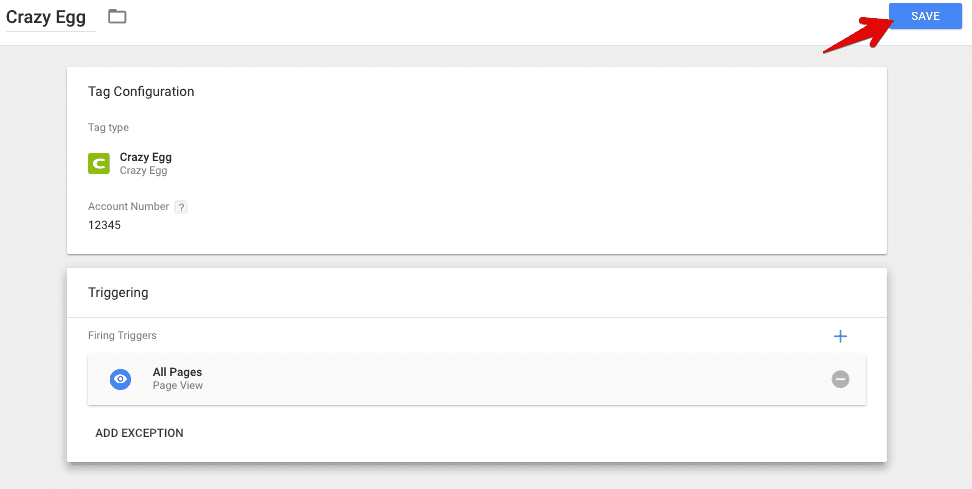
Step3: Enter the name of the tag as ‘Crazy Egg’ or something that is unique to identify.
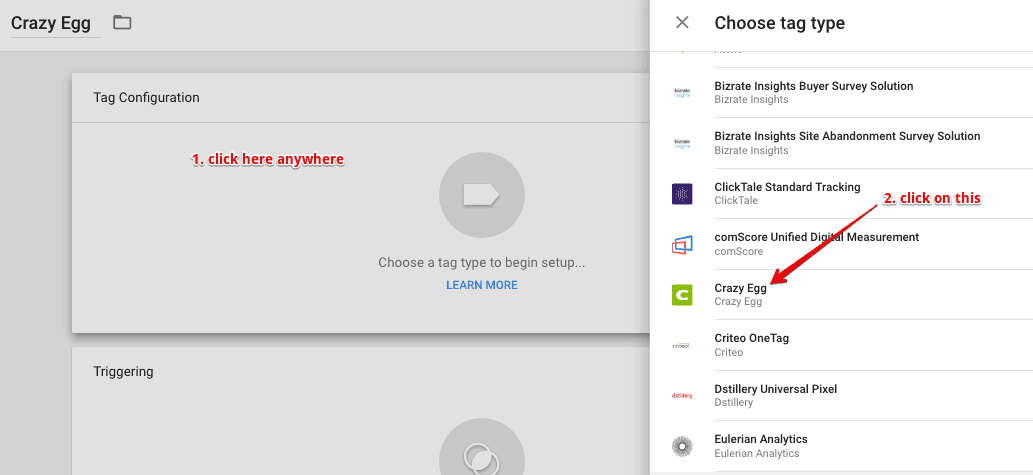
Step4: Click on the tag configuration box and scroll down the list to select the tag type as Crazy Egg.
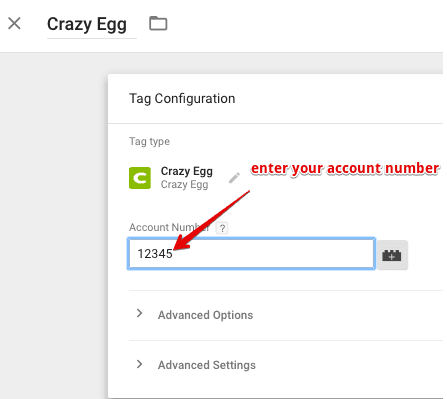
Step5: Enter your Crazy Egg account number inside the tag configuration field.
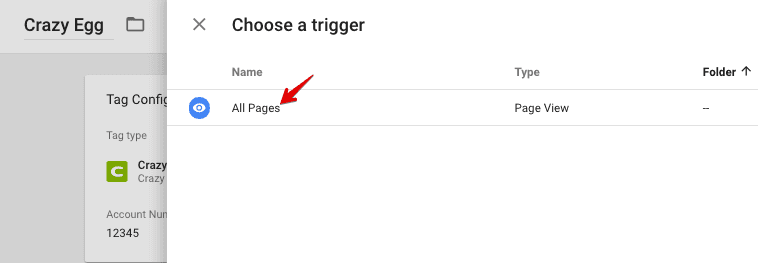
Step6: Click on the Triggering Area and choose all pages trigger.
Step7: Click on the save button.
Step8: Click on the preview button and open your website in a new tab to verify tag before setting it live.

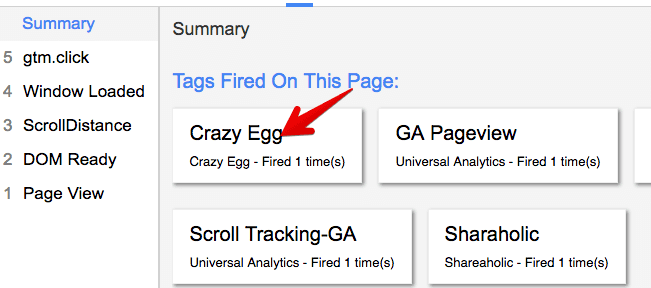
Step9: If you added the tag correctly, here is how it would look in the preview mode.
Congratulations! You have now added Crazy Egg in Google Tag Manager. Follow us on Twitter or subscribe to our newsletter to read more guides like this.


