Setting up Google Analytics on a Wordpress site should not be an intimidating process. It’s like adding a few lines of code. I have seen many Wordpress owners getting confused while installing Google Analytics and adding multiple types of plugins and ending up with a messy dashboard and zero results.
In this guide, I will show you how to install Google Analytics on Wordpress site without any plugin within a minute. I am not going into the details of creating a Google Analytics account because it’s simple and you can do by typing in your browser analytics.google.com.
How to Add Google Analytics Code on Wordpress
I am assuming that you have created a Google Analytics account. Follow the steps below to add Google Analytics code on Wordpress.
Step1: If you don’t know where to find the analytics tracking code, login to your GA account, select the specific property and navigate to admin.
Step2: Select Data streams >> Configure tag settings >> Installation instructions
Step3: Click on Install manually. Copy the tracking code
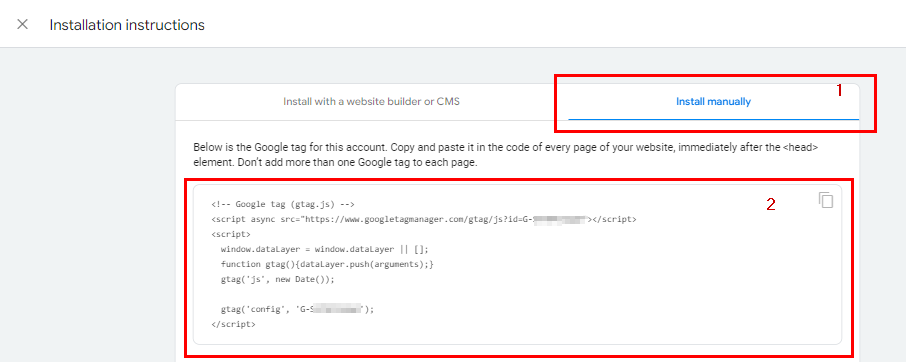
Step4: Now, open your Wordpress dashboard and navigate to Appearance >> Theme file Editor
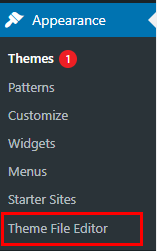
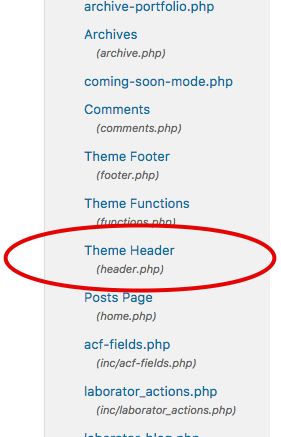
Step5: look for the header.php file and open it.
Step6: Now paste the Google Analytics tracking code just below the <head> tag and hit the update file button.
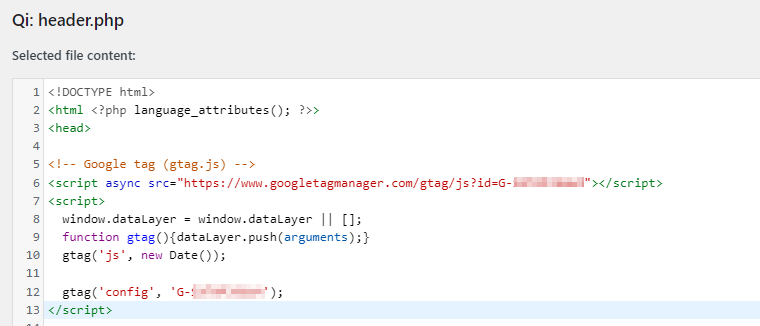
Step7: Open your website in a new tab and go back to your GA account. Navigate to Real-Time. If you have followed the above steps carefully, you will see the number of visitors on your website currently.
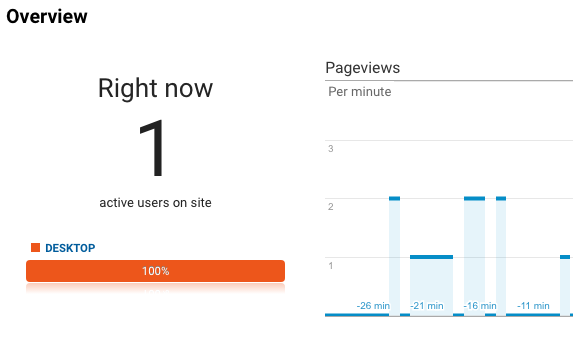
In case you don’t see any real time data, move to the top of this article and re-check if you made any mistake. Otherwise, you can install Google Tag Assistant extension and look for the errors it shows.
If you found this guide helpful, you can follow us on Twitter to get more tutorials like this.


