Do you have a Shopify store? Are you looking to setup enhanced ecommerce tracking? You have come to the right place. In this article, I will show you how to setup Google Analytics enhanced ecommerce tracking in Shopify and give away free pre-built goals and dashboard for your Shopify store.
Add Google Analytics to Shopify
Before you set up ecommerce tracking, it’s important that you add Google Analytics tracking ID. In case if you haven’t yet connected analytics with Shopify, follow the steps below, otherwise, you can skip this step.
- From your Shopify admin, got to Online store > Preferences.
- In the Google Analytics section, click Manage pixel here.
- Click Connect your Google account.
- In the Your Google Analytics property section, select the tag for the GA4 property that you want to connect to your Shopify store.
- Click Connect.
Enable Enhanced Ecommerce Tracking
To enable enhanced ecommerce tracking, check the ‘Use Enhanced Ecommerce’ checkbox under the Google Analytics field in your Shopify dashboard.

Save the changes.
The best thing about Shopify is it takes care of all the ecommerce code and get things done automatically.
Setting up the Right currency in Google Analytics
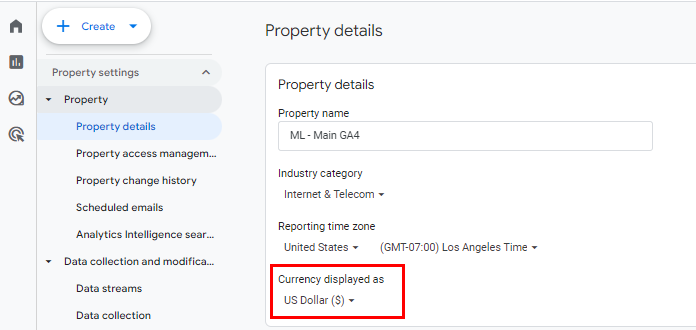
By default, the currency in Google Analytics is set to the US Dollar ($). If you don’t sell stuff in the US, you will have to change the currency settings in Analytics. To do this, just click ‘property details’ in admin section, now scroll down to ‘currency’. Select the correct currency from the drop-down, and you’re done!
Setting up Referral Exclusion list in Google Analytics
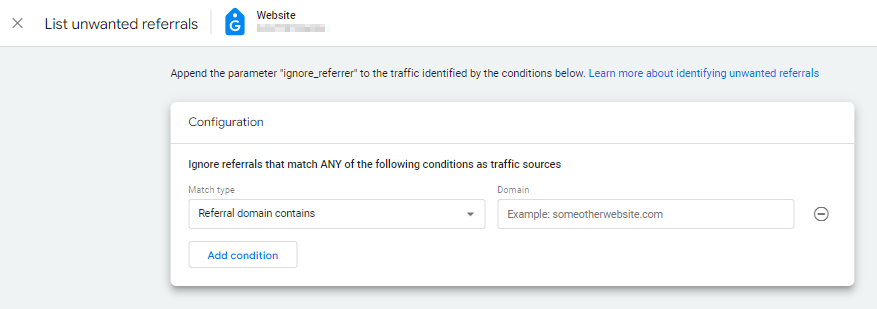
If you are using PayPal or any other payment gateway, you will need to add the payment gateway domains to the referral exclusion list. Doing this will help Google Analytics attribute the conversion to the right traffic source. For Shopify, you also need to add the checkout.shopify.com to your referral exclusion list.
Testing Ecommerce Tracking
Now, let’s make sure that the ecommerce tracking works correctly. First, open preview mode in Google Tag Manager. Next, in a separate tab, open your website. Now, make a test purchase using your own credit card. You can also use a 100% discount coupon, if that suits you, just go with the easier option.
Now you wait. Give it an hour, and then open your Google Analytics account. Now, navigate to Monetization >> Overview and set the date range to include today. If you are able to see the transaction data for the product you purchased, you are good to publish the tag manager changes. If however, you can’t see the ecommerce data, check if you’ve followed all the steps correctly, and wait a little more.
Set up Purchase Goal Funnel
Setting up the purchase goal funnel help you see how many users drop off during the purchase journey. It helps you see the number of users dropping off on each particular step. This can help you improve the funnel to make sure more users purchase from your shop.
We already have built the goal funnel for Shopify and shared it in one of our previous articles. You can click here to open the article and import the goal funnel into your analytics account.
Setting up the Ecommerce Report
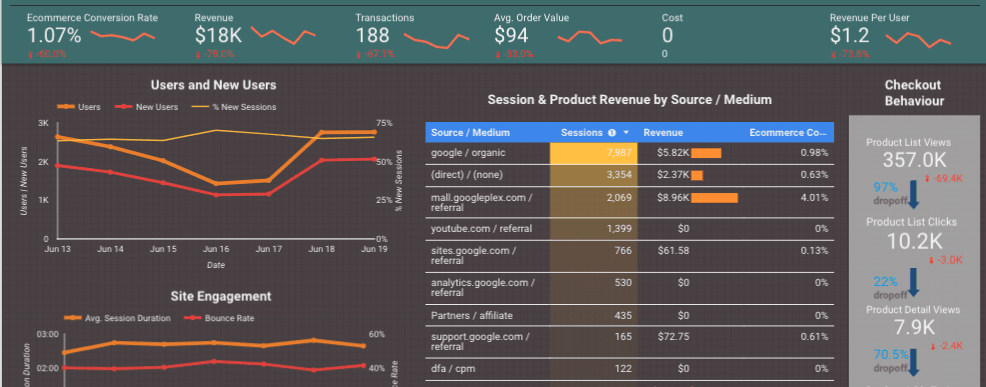
We have been working with analytics for the past 8 years and we know what kind of difficulties our clients face hanging around analytics to find the right reports. To make sure you see the reports you need, we have created an awesome ecommerce Data Studio template. Click on the below button to get the template and stop worrying about what to see in analytics.
Conclusion:
If you have also installed Google Tag Manager on your Shopify Store for any other purpose, make sure not to set up Google Analytics pageview tag in GTM.
