Cookies are equally important with both tea and web. In Google Tag Manager, we can use cookies to store a value and can also use this to trigger a tag. Cookies are stored in users browser which makes it possible to identify a unique vs returning visitor and also used for stopping multiple transactions.
In this article, I will share the best cookies recipe. We’ll go through creating and reading cookies with Google Tag Manager and two important use cases where cookies play an important role.
Want to learn more? Check our work by clicking here.
Create & Read Cookies in Google Tag Manager
The easiest way to create a cookie in GTM is via custom HTML tag. Creating cookies via custom HTML tag is even easier than baking them in the oven. For example, you can set the cookie when a specific tag is fired. Below is a simple way to create a cookie.
<script>
var cookieName  = "FormSubmitted";
var cookieValue = "True";
var cookiePath  = "/";
var expirationTime = 2628000;                           //For example one month in seconds (2628000)
expirationTime = expirationTime * 1000;                 //Convert expirationtime to milliseconds
var date = new Date();                                  //Create javascript date object
var dateTimeNow = date.getTime();                       //Get current time in milliseconds since 1 january 1970 (Unix time)
date.setTime(dateTimeNow + expirationTime);             //Set expiration time (Time now + one month)
var expirationTime = date.toUTCString();                //Convert milliseconds to UTC time string
document.cookie = cookieName+"="+cookieValue+"; expires="+expirationTime+"; path="+cookiePath;  //Set cookie
</script>
To read the cookie value you will have to create a user-defined first-party cookie variable.
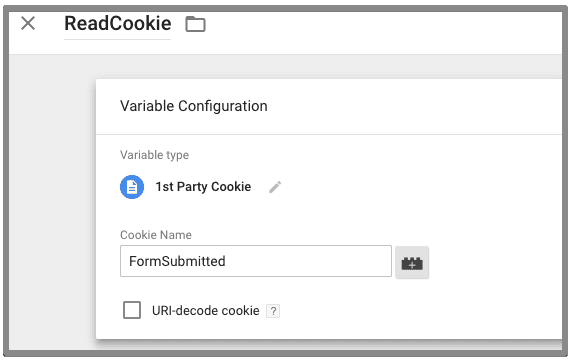
This will grab the value stored in the cookie. Now I want to share with you some very important use cases of cookies in Google Tag Manager to help you understand.
Cookies with Google Tag Manager Use Cases
1. Fix Ecommerce Duplicate Transactions
If you have setup ecommerce tracking via GTM, you might notice sometime the duplicate transactions. Duplicate transactions mean having a single transaction recorded multiple times in Google Analytics.
This problem can occur due to following reasons:
- Refreshing the page
- Returning to page via email link or bookmark
- Returning to the same page via back button
You can create a custom report in Google Analytics to view duplicate transactions.
To fix this issue we will use a cookie to store the transaction ID. Follow the steps below to block duplicate transactions.
To get this done we will need three variables, one trigger, and a custom HTML tag. Make sure to copy and paste the same variable, triggers and tags names, otherwise, you will get into an issue.
1. Create a custom JS variable
The variable will return true false if transaction value in the cookie matches with current transaction Id and returns true if not matches. Set the variable name as ‘transactionCookieCheck’.
function(){
  if({{transactionCookie}}==={{transactionId}}){
    return false
  }
  else{
    return true
  }
}
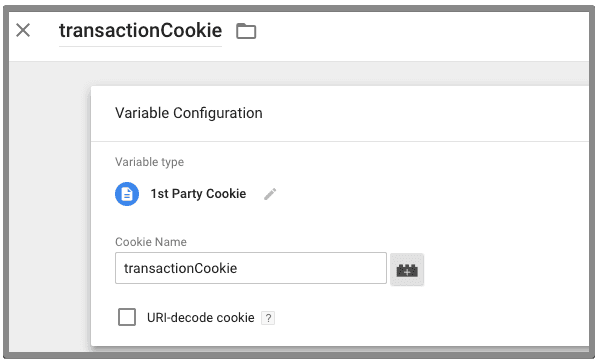
2. Create a first party cookie variable
This variable will read the value from the cookie. Enter the cookie name as ‘transactionCookie’

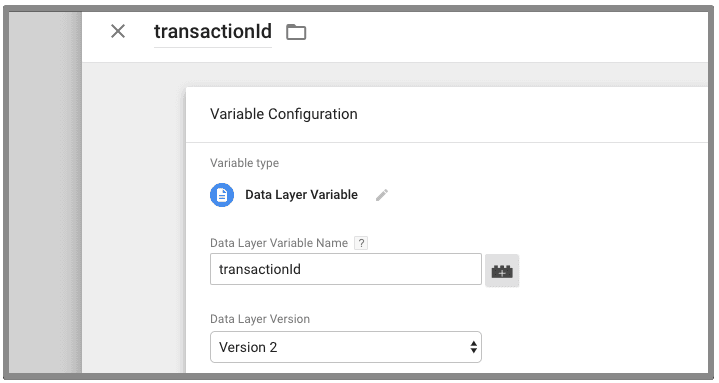
3. Create a datalayer variable
This will be the transaction id. You will already have created this variable for ecommerce tracking, in case you didn’t create this variable now.
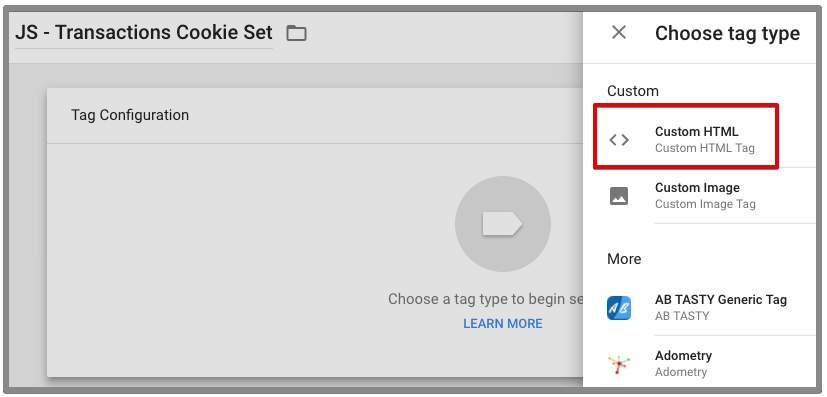
4. Setup a Cookie using Custom HTML Tag
- Create a new tag
- Enter the tag name as ‘JS – Transactions Cookie Set’
- Select the tag type as ‘Custom HTML’
Paste the below code inside the custom HTML to set a cookie:
<script>
function setCookie(name, value, expires) {
    document.cookie = name + "=" + escape(value) + "; path=/" + ((expires === null) ? "" : "; expires=" + expires.toGMTString());
}
var exp = new Date();
exp.setTime(exp.getTime() + (1000 * 60 * 60 * 24 * 30));
  if({{transactionCookieCheck}}===true){
      setCookie("transactionCookie",{{transactionId}},exp);
  }
</script>
The above code is easy-peasy. The setCookie function sets a cookie. There are three parameters in the function:
- Name: cookie name
- Value: cookie value
- Expires: cookie expiry time
exp.setTime sets the expiry time to
The if condition creates a cookie if the transaction id doesn’t matches with the cookie value. Where ‘transactionCookieCheck’ is a custom javascript variable which returns true if cookie value equals transaction id otherwise returns false. While ‘transactionId’ is a datalayer variable which captures transaction id from the datalayer.
Add the transaction trigger to fire this tag.

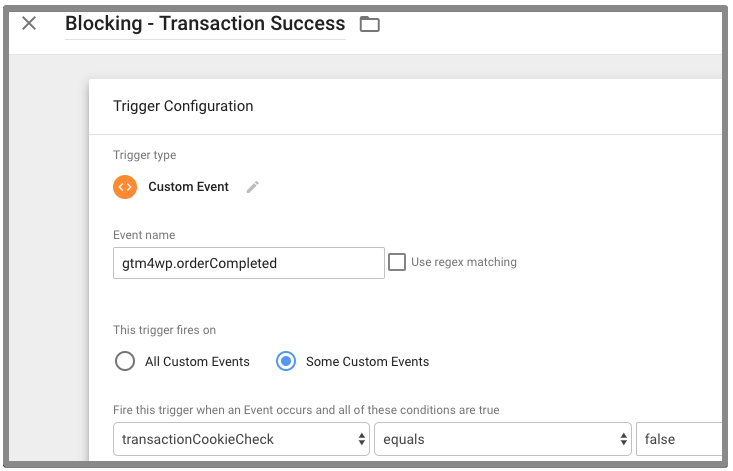
5. Create a Blocking Trigger
Now the logic here is to not fire the transaction tag if cookie already contains the current transaction ID. For this purpose, we will create a trigger that will block the transaction tag from firing twice.
Duplicate the transaction trigger and name it ‘Blocking – Transaction Success’. In my case, the transaction tag fire on a custom event, so I will choose this trigger to set for some custom events and apply the condition as displayed in the image below.
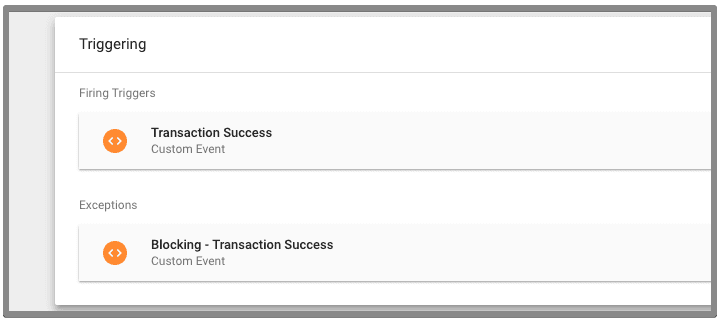
6. Add Blocking Trigger as Exception
Now, open the transaction tag and add the above trigger as an exception.
Once you do this, preview the changes and test by refreshing the transaction success page. If you have followed all the steps carefully, this technique will work.
2. Trigger a Pop Up on Second Visit
Marketers are always on the lookout for tools that make life easier. If you have GTM installed on your website, you can use it to personalize internal promotions. One of the good example can be triggering a pop-up or promotion based on visitor behavior i.e displaying a pop up when a visitor visits a specific page again.
Let’s say you want to trigger live chat when a visitor views a web page more than once.
To do this, we will create a custom HTML tag that will set a cookie when the visitor lands on the page.
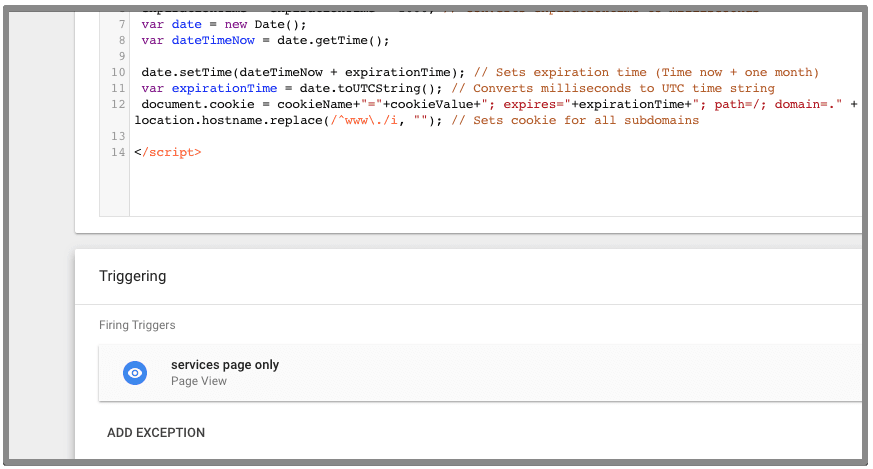
<script>

 var cookieName = "ServicesPageVisit"; // Name of your cookie
 var cookieValue = "true"; // Value of your cookie
 var expirationTime = 2592000; // One month in seconds
 expirationTime = expirationTime * 1000; // Converts expirationtime to milliseconds
 var date = new Date();
 var dateTimeNow = date.getTime();
 date.setTime(dateTimeNow + expirationTime); // Sets expiration time (Time now + one month)
 var expirationTime = date.toUTCString(); // Converts milliseconds to UTC time string
 document.cookie = cookieName+"="+cookieValue+"; expires="+expirationTime+"; path=/; domain=." + location.hostname.replace(/^www\./i, ""); // Sets cookie for all subdomains
</script>
Set this tag to fire on the specific page only i.e services.
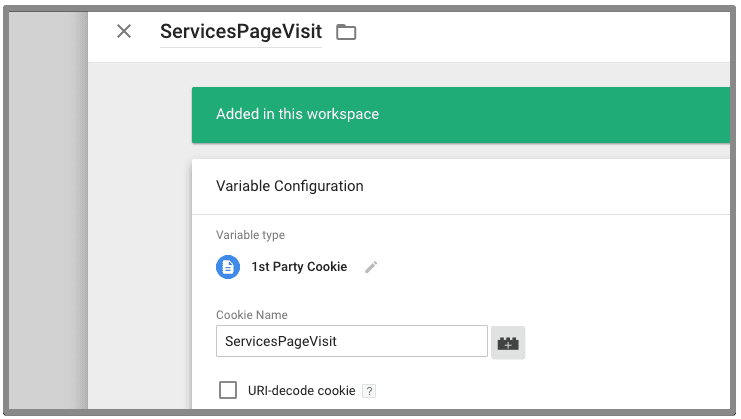
Create a first party cookie to retrieve the value of this cookie.
Create a new trigger for your live chat or any other tag you want to fire.
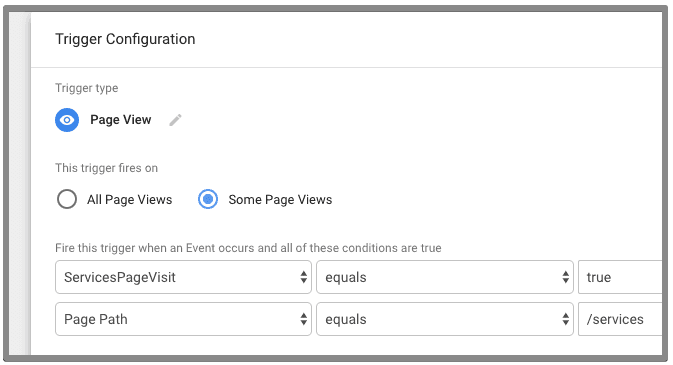
Save the trigger.
Preview the container and test by viewing the specific page more than once. You can also change the cookie code to fire the tag when a visitor views a page more than three times or according to your needs.
Conclusion:
Just like that, cookies make life fun! You can now imagine how cookies can help you make complex things easy to accomplish. With cookies, you have the ability to store anything on clients browser and set a campaign based on his/her behavior. Do you have any idea what else we can achieve using cookies? Let us know in the comments below and share what you have done so far.
Related Posts:
What Does Google Tag Manager Do?