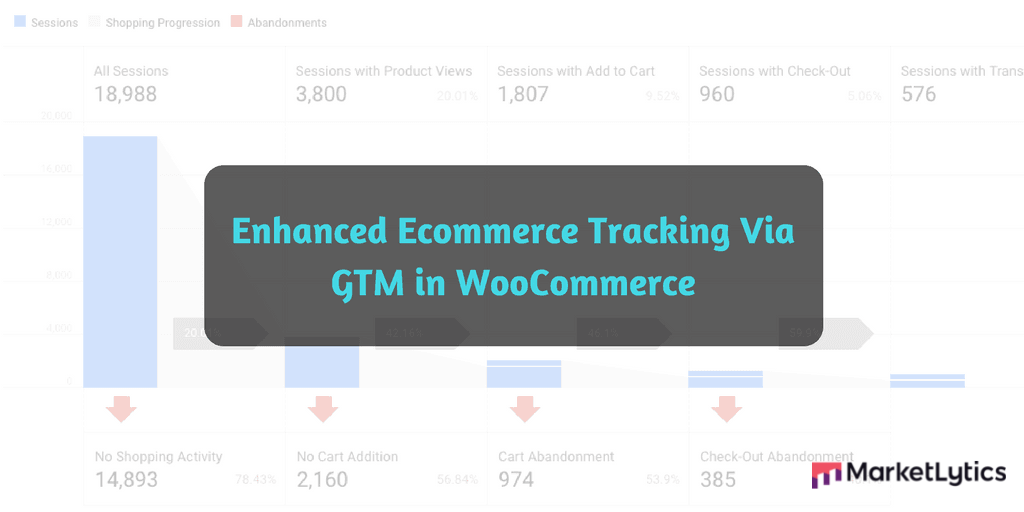
Enhanced Ecommerce Tracking in WooCommerce is fairly simple in comparison to other websites, yet many people still face difficulties implementing it.
To make it easier, we have compiled a simple, yet thorough step by step guide to implement enhanced ecommerce tracking for WooCommerce. As a bonus, we have also included an awesome DataStudio ecommerce template at the bottom. For free!
To follow this tutorial I am assuming that you have a WooCommerce store and have installed Google Tag Manager using DuracellTomi’s plugin.
Step1: Prerequisites
The best practice to setup enhanced ecommerce is to create a new view and test before setting it up in the master view. If you have already setup enhanced ecommerce you will still be able to see the reports in the enhanced ecommerce reports.
Step2: Enable Enhanced Ecommerce Tracking in WordPress
For enabling enhanced ecommerce tracking, open your wordpress dashboard and navigate to Settings >> Google Tag Manager.
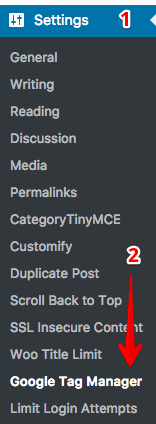
Go to integration, select WooCommerce and enable ‘track enhanced ecommerce’ checkbox.

Click Save changes button at the bottom of the screen.
Step3: Verify Data is Pushing to Data Layer
Once you enabled enhanced ecommerce tracking from the wordpress plugin, it’s now time to verify if it is pushing the e-commerce data to the data layer.
To do this, install data layer inspector extension in your browser:
On your website, right click and select inspect element
Navigate to console and you should see the data layer data as shown in the image below.
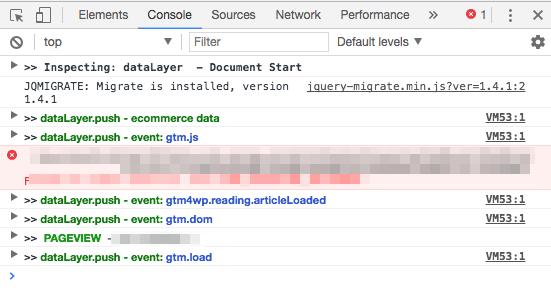
If you are not seeing the data layer like the image above, open a product page, or go back to your wordpress and make sure you have saved the changes.

Step4: Enable Enhanced Ecommerce in Universal Pageview Tag
To enable enhanced ecommerce from tag manager, follow the steps below:
- Go to your Google Tag Manager account and open Universal Analytics pageview tag
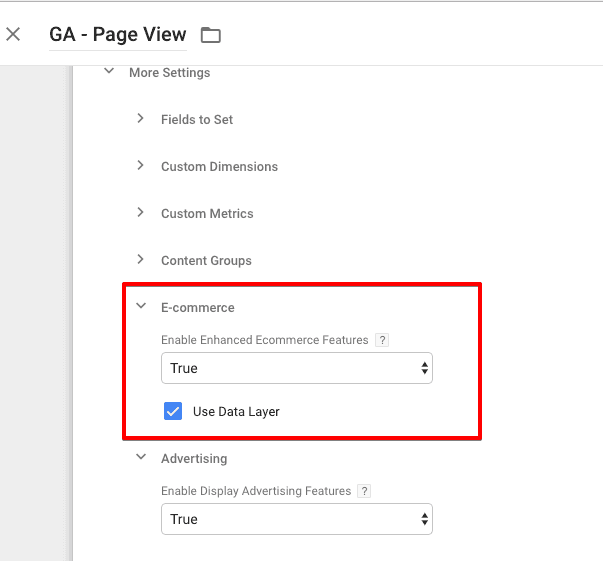
- Click on More Settings
- Click E-commerce
- Change the Enable Enhanced Ecommerce Features to true and check the Use Data Layer checkbox.
- Save the tag.
Enabling enhanced ecommerce features will activate some of the data collection:
- Product impressions
- Product detail impressions
- Checkout impressions
- Transaction tracking
Step5: Setup Custom Events in Tag Manager
For tracking add to cart or checkout steps, we will have to setup custom events in tag manager. To do this, follow the steps below:
Create a new trigger
- From the left menu, click on triggers and click the new button
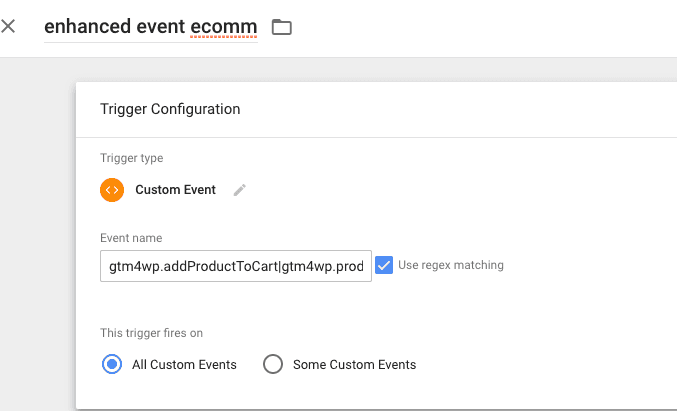
- Select the trigger type the custom event
- Enter this in the event name field: gtm4wp.addProductToCartEEC|gtm4wp.productClickEEC|gtm4wp.removeFromCartEEC|gtm4wp.checkoutOptionEEC|gtm4wp.changeDetailViewEEC|gtm4wp.checkoutStepEEC
- Check the use regex matching checkbox
- Enter a name for the trigger and save
Create a new tag
- Create a new tag
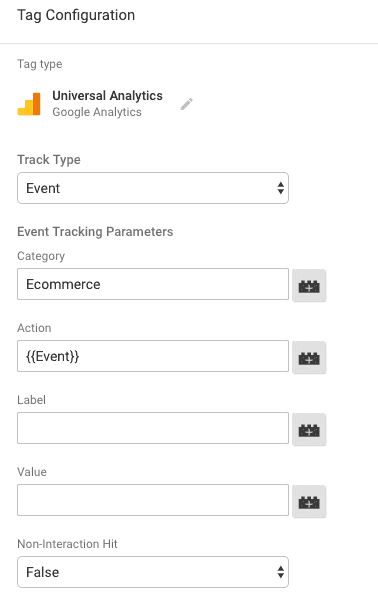
- Select the tag type as Universal Analytics
- Set track type as Event
- Add values to Event Category and Event Action (Ecommerce & {{Event}})
- Enable advertising and any other feature that you enabled in the pageview tag
- Click more settings and enable enhanced ecommerce tracking and check use data layer like we did in the previous tag
- Add the trigger we created in the above step to this tag
- Enter a name for your tag and save the tag.
Once you complete the steps above, you will now be able to see ecommerce reports in Google Analytics within two hours. To verify your e-commerce setup, go to your website, and purchase a product, and check the ecommerce reports in analytics later.
To view your ecommerce reports, navigate to conversions >> ecommerce >> overview.
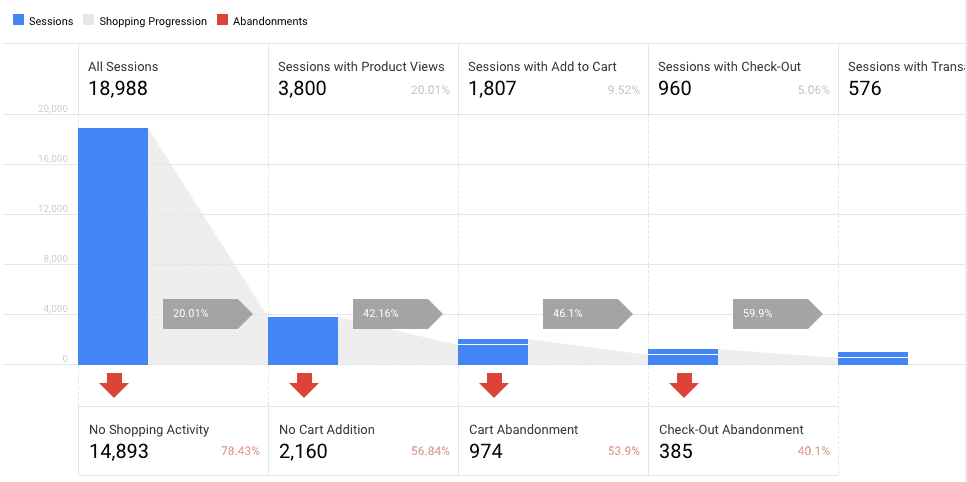
To see how visitors navigate through the purchase process, click on shopping behavior under ecommerce.
To see the checkout behavior, you will have to add the checkout steps under ecommerce settings.
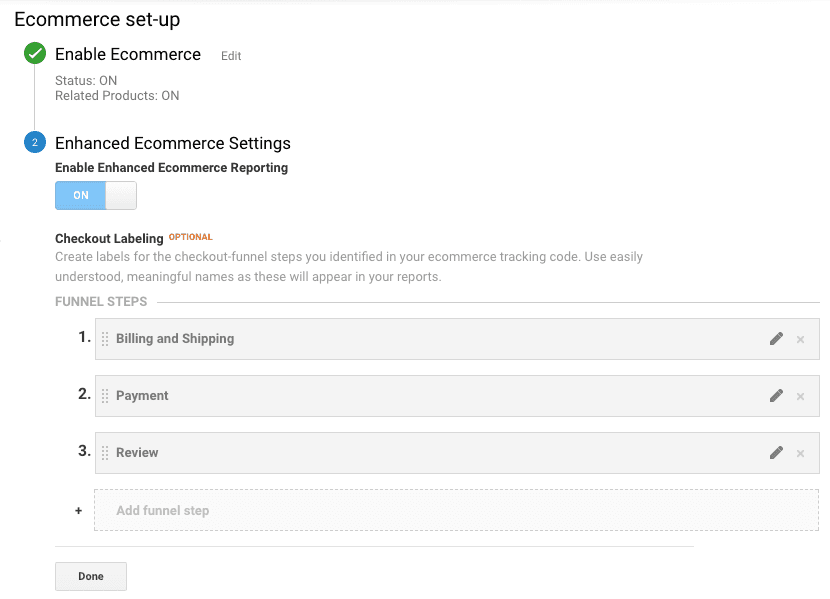
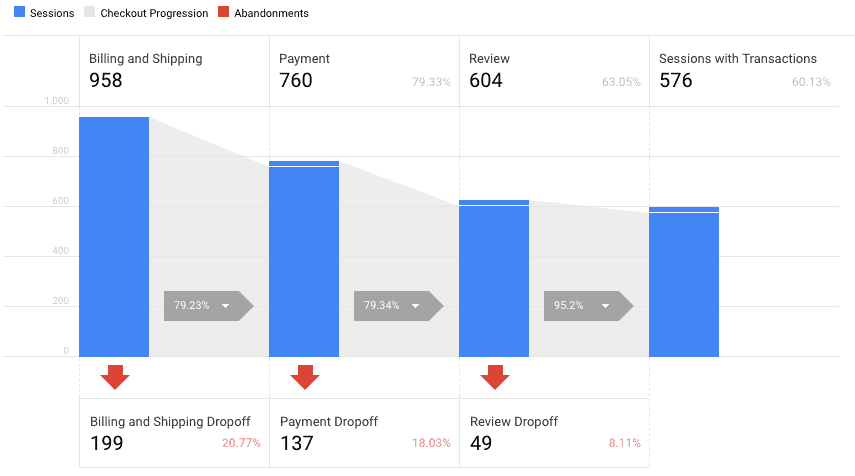
Once you add the checkout labeling, you will be able to see the checkout behavior report under ecommerce.
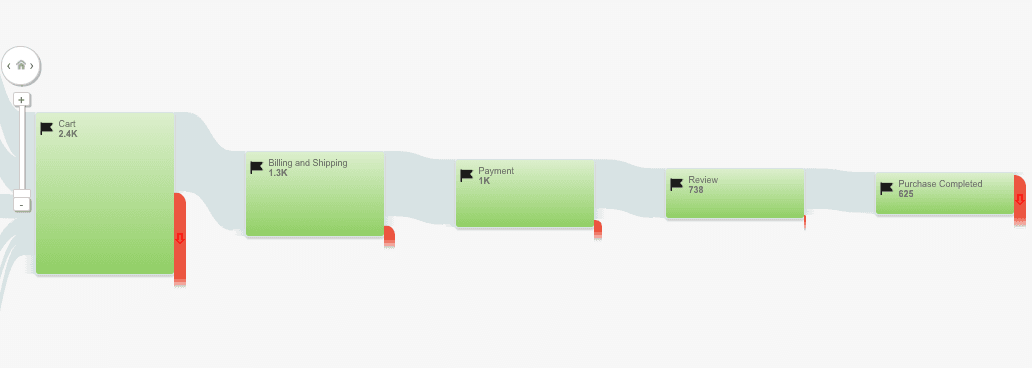
The final step is to implement the goal flow to understand the conversion funnel. The goal flow report will help you see the irregular purchase behavior.
Bonus: Google DataStudio Ecommerce Report
For helping you understand ecommerce data, we have created an ecommerce DataStudio template. Click on the link below to use this template and understand your ecommerce data.