A website is incomplete without google analytics and similarly google analytics is incomplete without setting up goals. This article is a step by step guide to set up ecommerce goals for your online store. Every ecommerce store should have the following four ecommerce goals.
- User Engagement Goal
- Add to Cart Goal
- Customers Reaching Checkout
- Purchase Complete
If you are looking for more information on it, visit our home page.
1. User Engagement Goal
To find the user engagement we will setup a goal for the users who viewed more than 3 pages in a single session.
Step #1: From the goal setup options select goal type as custom
 goal setup options
Step #2: In the goal description menu, enter a name for your goal and select type as pages/screens per session
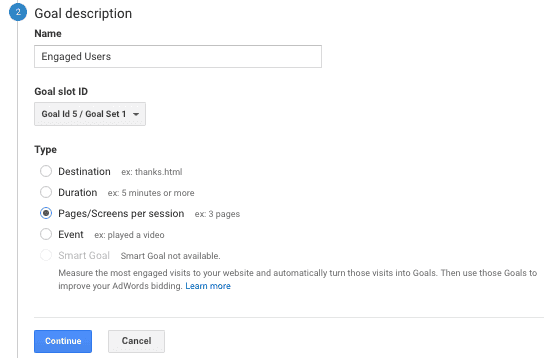 Goal description options
Step #3: From the goal details menu enter pages/screens per session greater than 3
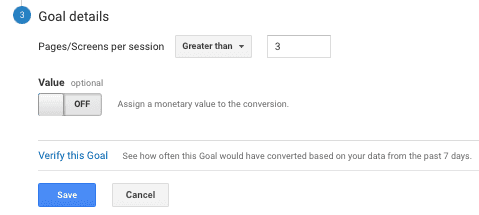 goal details options
Step #4: Click Save and then click Done

2. Set up Google Analytics Goals for Ecommerce Add to Cart
Set up a goal when a user reaches the add to cart page.
Step #1: From the goal setup options select goal setup as Template and Engagement as Add to Cart
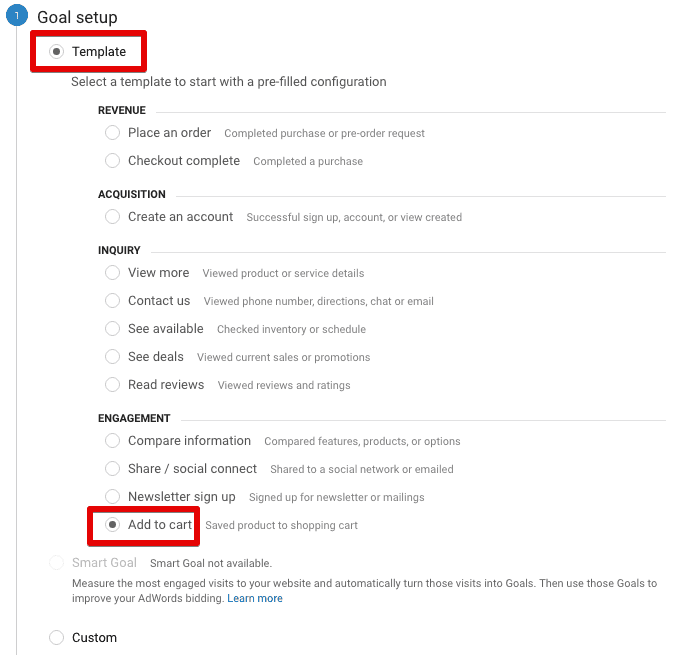 goal setup
Step #2: In the goal description menu, enter a name for your goal and select type as Destination
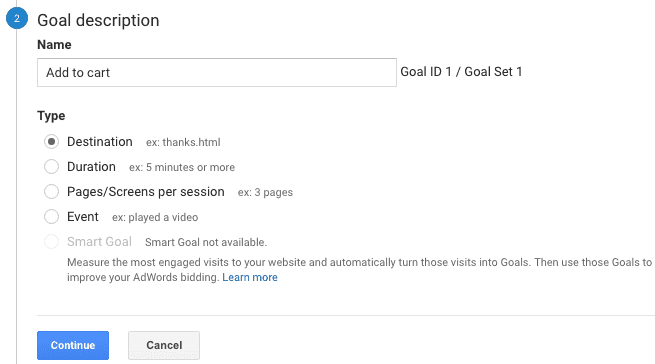 add to cart goal description
Step #3: From the goal details menu enter the destination begins with your cart page url.
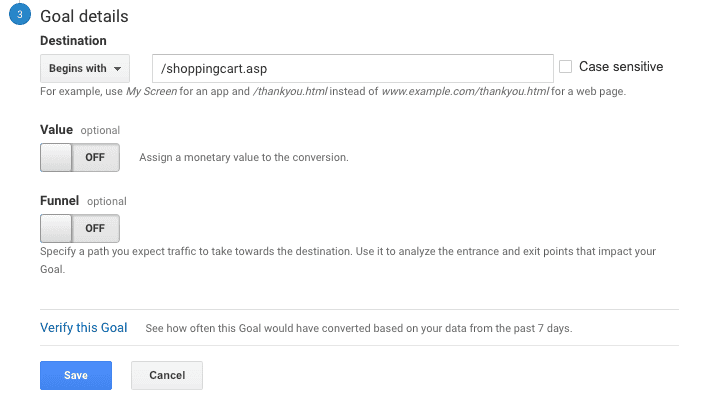 add to cart goal details
Step #4: Click Save and then click Done
3. Set up Goal for Customers Reaching Checkout
This goal will be completed when a user reached checkout page on your ecommerce site.
Step #1: From the goal setup options select goal type as custom
reaching checkout goal setup
Step #2: In the goal description menu, enter a name for your goal and select type as Destination
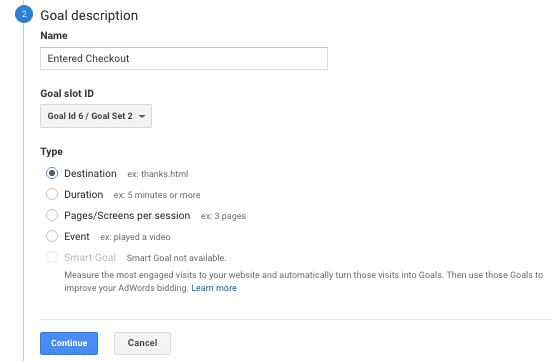 entered checkout goal description
Step #3: From the goal details menu enter set your destination as your checkout page, in my case in choose Destination Begins with /orderfinished.asp
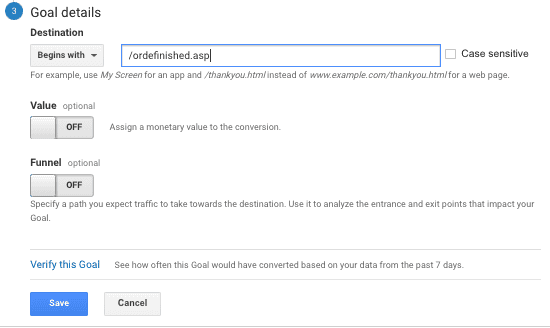 entered checkout goal details
Step #4: Click Save and then click Done
4. Set up a Goal When a Purchase is Complete
We will set up a goal when a user completes a purchase.
Step #1: From the goal setup options select goal type as Template and next select Checkout Complete
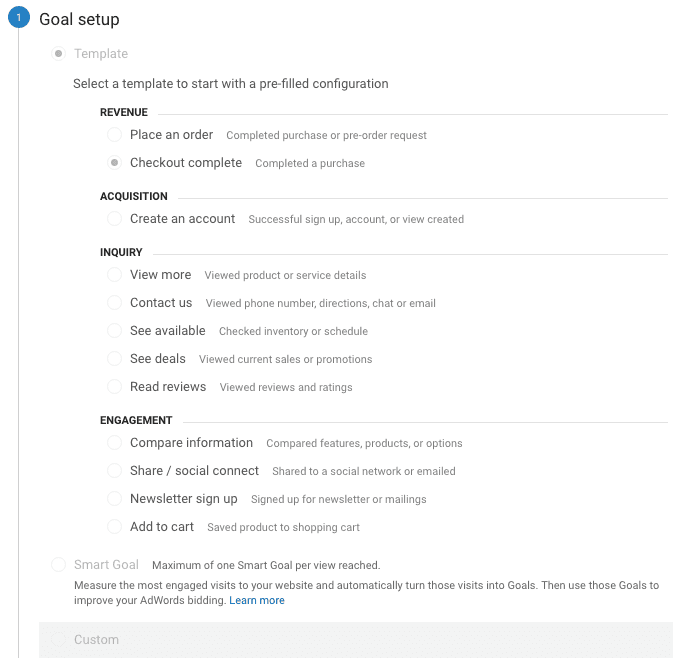 complete purchase goal setup
Step #2: In the goal description menu, enter a name for your goal and select type as Destination
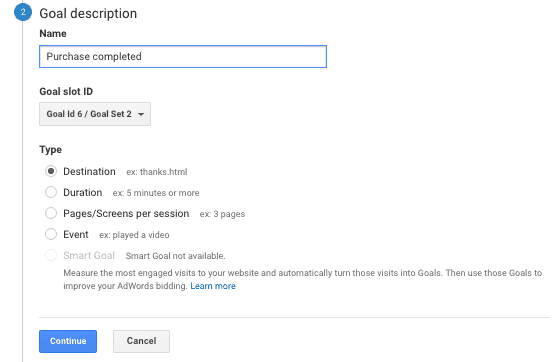 complete purchase goal description
Step #3: From the goal details menu enter set your destination as your checkout page, and create the funnel as shown below, but replace the fields with your own data
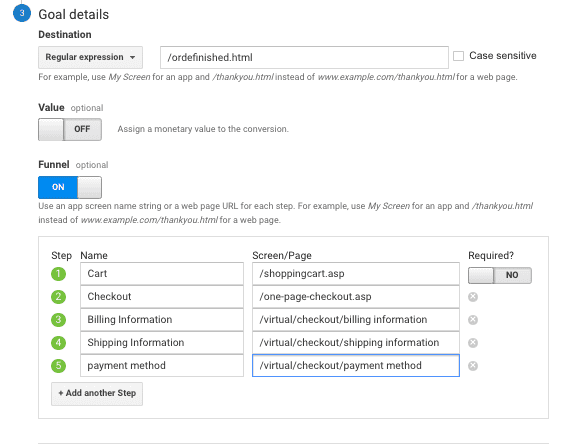 complete purchase goal details
Step #4: Click Save and then click Done.